DIY WINDOW BOXES
For the last 2 years I have wanted to spruce up the outside of the guest house by adding some window boxes. I initially was waiting for the hubby to offer to make me some…..but that didn’t happen. Huge surprise. So since I’ve become a little more comfortable with my air nailer and chop saw, who am I kidding, I”m in love with them, I decided to tackle the project myself. I realized all it really was was a couple of 1x6s and 1×4’s, which I already had from left over signs and trim in the shed. I measured my windows and cut the wood the same length as the window.
I’m going to preface this post by saying that I’m not giving you a step by step tutorial. As always, I got excited about a project and didn’t stop to take photos along the way. I can tell you though that if you have a little bit of handiness in the power tool area, you will be able to figure it out:)
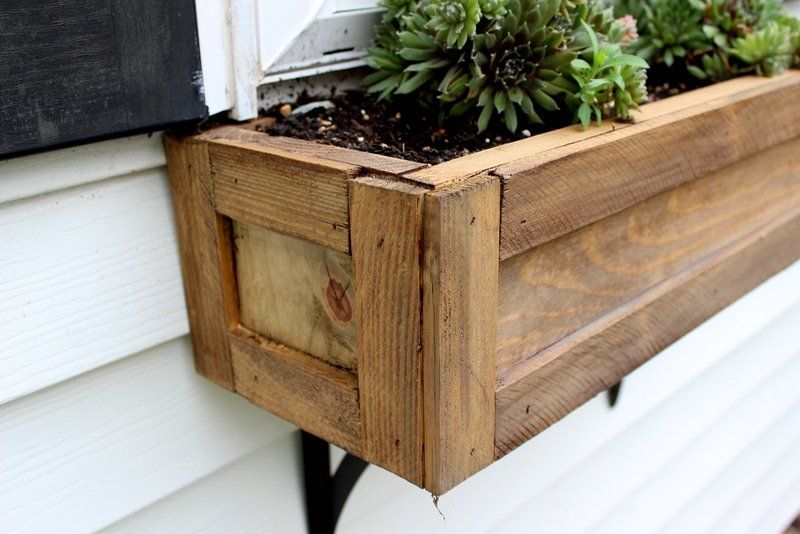
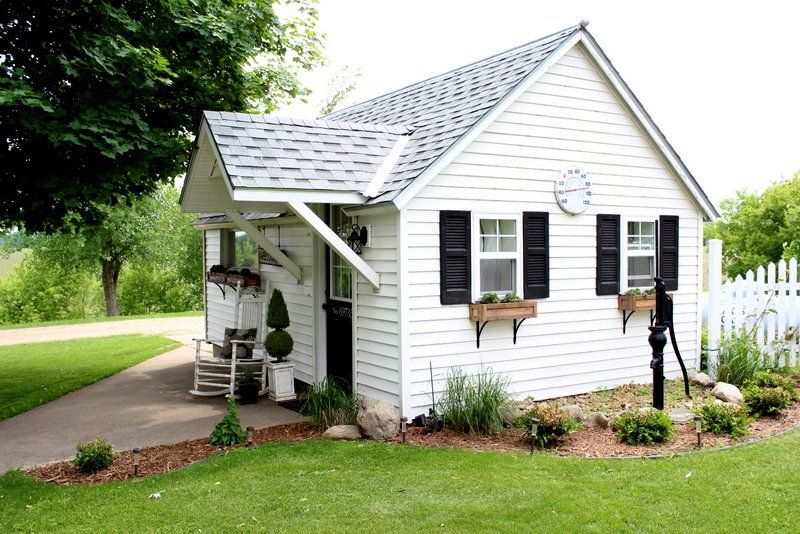
After I cut my 1″x6″ and 1″x4″ boards, I took out wood glue and my air nailer and first glued and then nailed the boards together. I laid the 1×6 flat and then butted my 1×4 up next to it. and nailed it with 2″ nails. Once I had the box framed up I used some lathe I had in the other shed for decorative trim. To cut the lath I just used Ryans battery operated skill saw. That way I could do one piece at a time. I glued that down and nailed it with 1 1/4″ nails. I ended up making 3 window boxes in about 2 hours…so when I say it really wasn’t that hard, I truly mean it! I stained them with Dark Walnut stain, drilled 3 holes in the bottom for drainage and stapled in some plastic to line the wood with so it doesn’t rot. Then I had found some brackets at Menards that were black that I loved, and thought the contrast on the white guest house would be nice. What I loved even more were that they were only about $2.50 a piece. So I ended up making all three window boxes for $15 since I had all the wood. And here’s the end result..
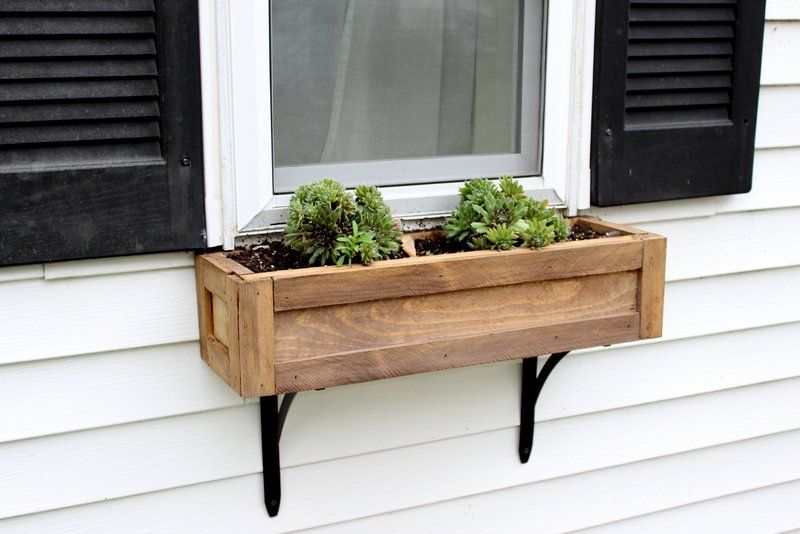
you can see in the close up that there is no such word as “perfect” in my book:)
There’s only “good enough” :) Ry loves that philosophy :) I know too many perfectionists that worry about doing it just right, when all I really want is the end result. So I”d rather have something that gave me the look that isn’t perfect, than never do it cause I was afraid I was going to mess it up…if you know what I mean!
And you honestly can’t tell when you look at the boxes that I may have been 1/8″ off here and there, and that there are nail holes that aren’t filled…
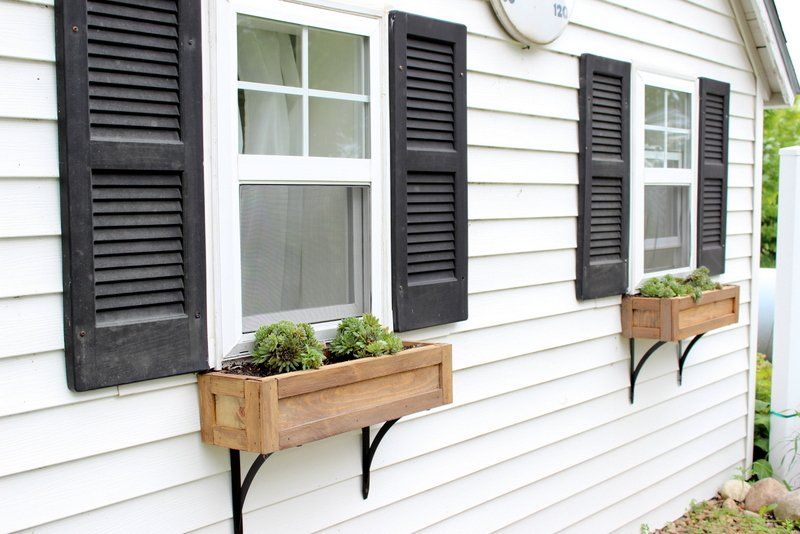
All I see are some pretty cute window boxes that cost me next to nothing and add a ton of character to this little shack:)
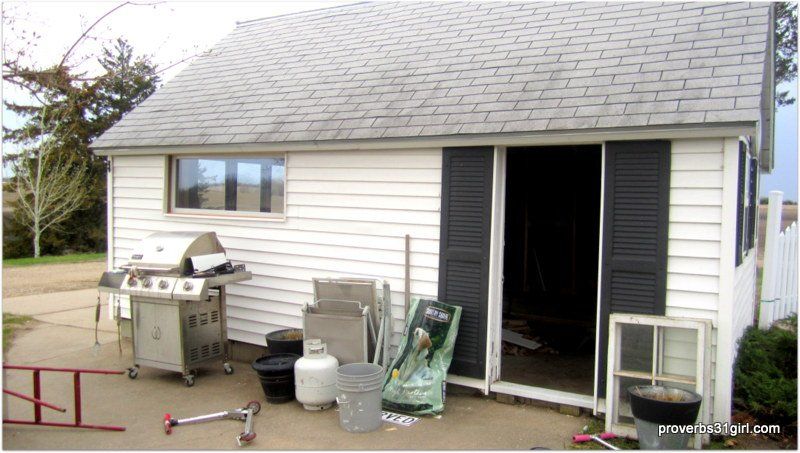
Let’s just have a bit of fun and go way back to when the guest house was a garage..
turned into guest house….
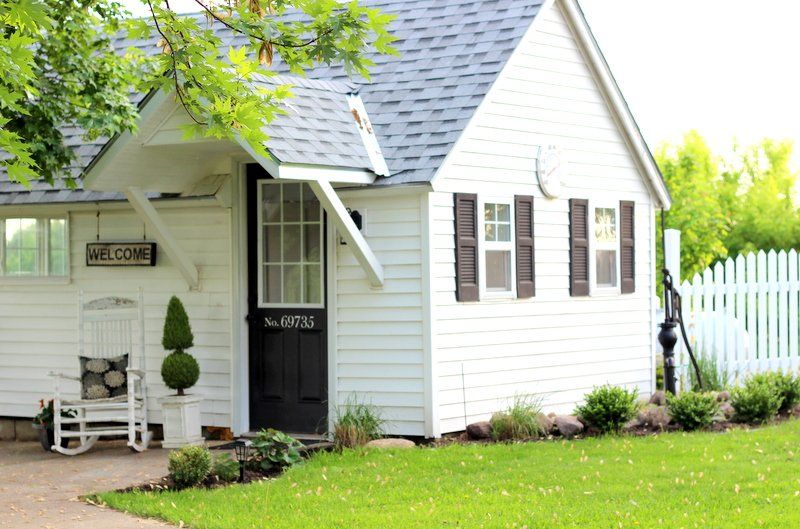
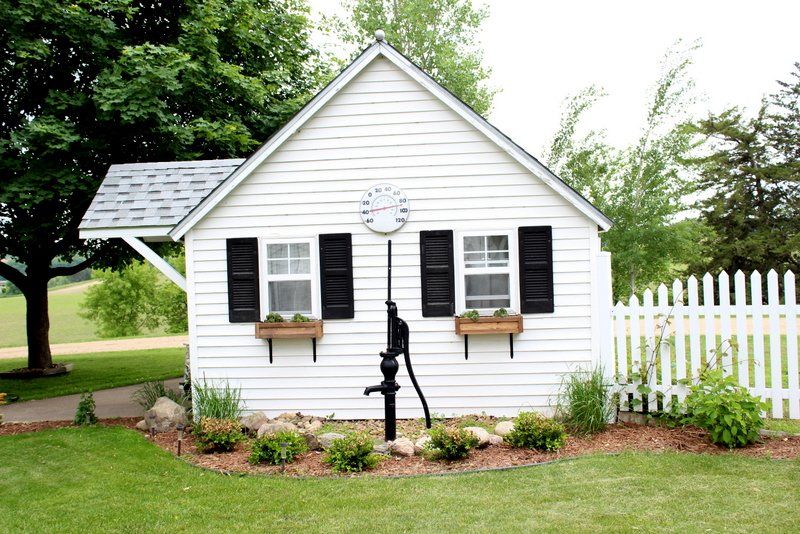
and now with window boxes…
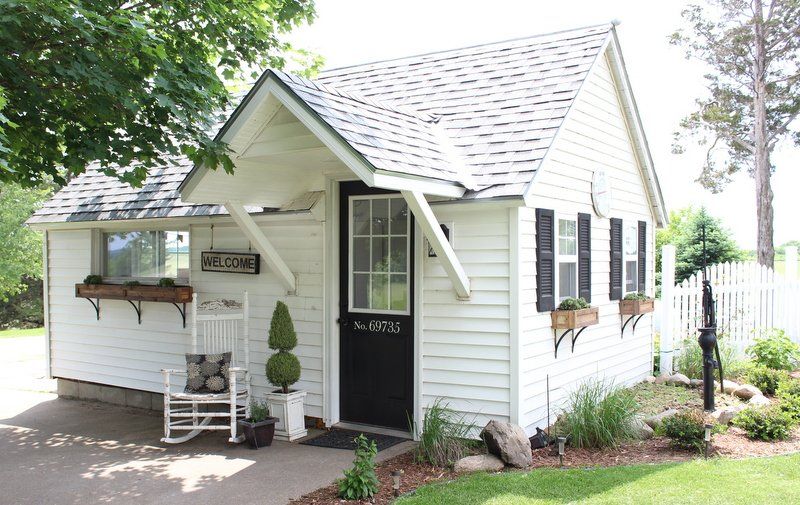
don’t mind all the weeds:)
I ended up finding some succulents at Menards on sale called Hen and Chicks. They were $2.99/piece. If you haven’t noticed I am kind of in love with the English garden look of all white and green. Goes with my monochromatic taste I guess. So these were perfect. And since they are a succulent I don’t have to water them much. Bonus!
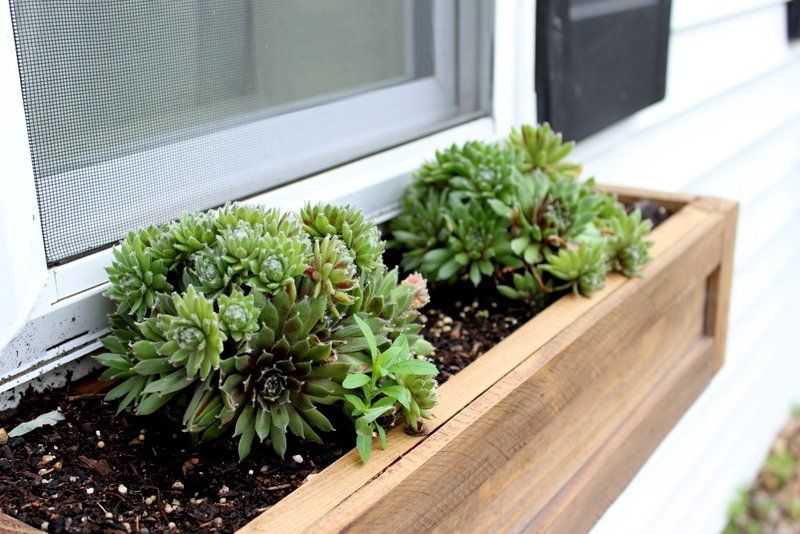
I think I may add a little alyssum for a pop of white as well.

And here’s what you see when you pull up to our house from the back side…
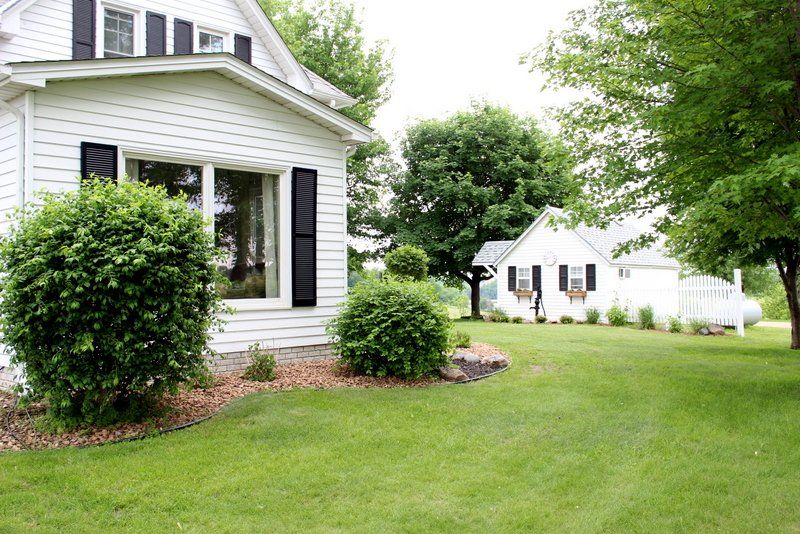
I kinda love that it’s a little mini me to the big house!
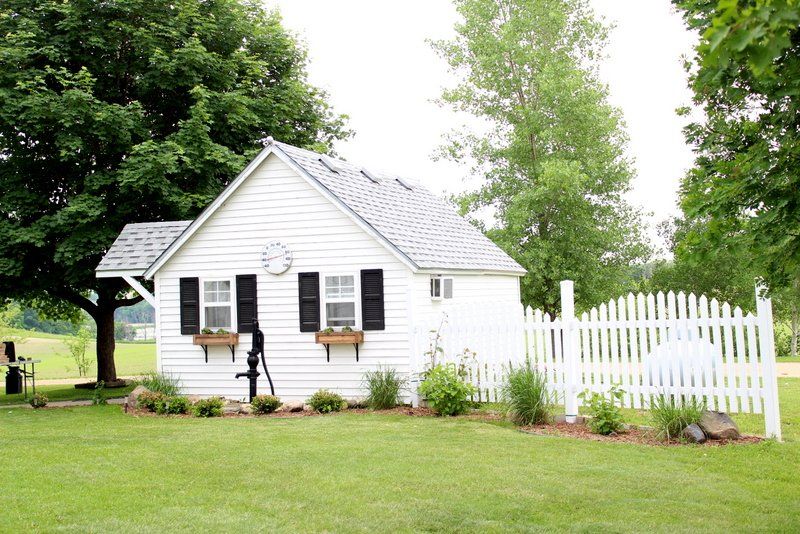
and I also love that the former owners put up that cute white fence to hide the propane tank. Genius!
and this is the view from my kitchen window…
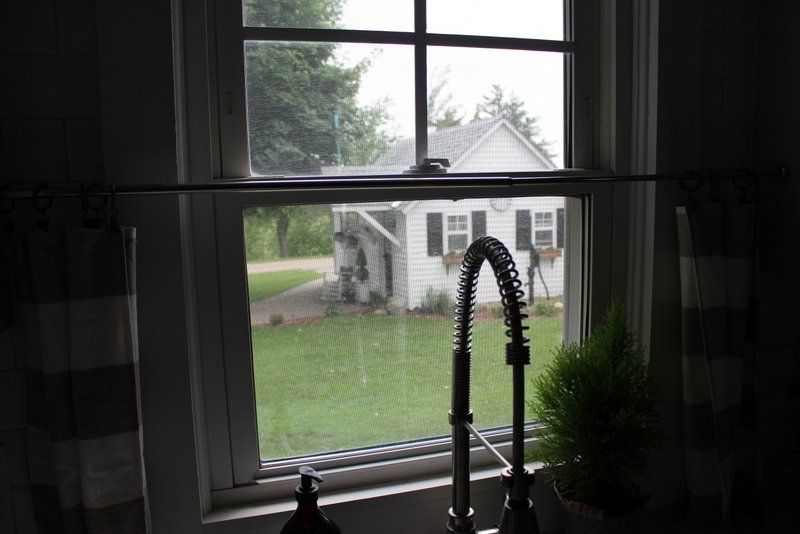
If that helps with the layout!
I took a few more pictures outside and worked on another Whimsy project today that has an outdoor theme that I’ll be blogging about the rest of the week. Sometimes I get so stuck on the inside of the house, I forget how much I love to decorate the outside as well!