MASTER BATH REVEAL
Well, this little bathroom of ours is the smallest “new” space that we created, and the most time consuming. How ironic. It’s probably the most costly as well:) Why is that?!? We decided that anytime you do anything “custom”…the clock ticks slower and the wallet drains faster, even when you do it all yourself! But this time around we knew a few things we wanted to spend the time on….and money…such as the shower.
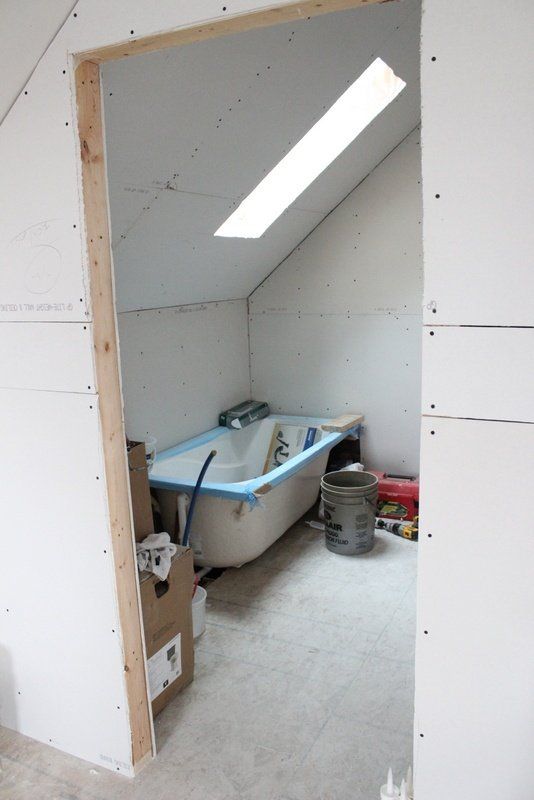
So here’s a before shot of where the bathroom was last at….
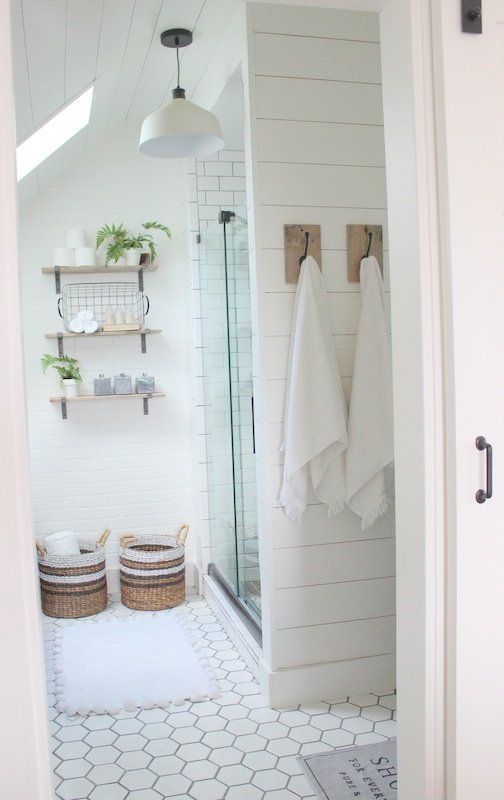
and here it is now…
Ryan was adamant we had a big shower. So adamant that he gave me such grief over wanting a soaker tub and eating into his space. But I was MORE adamant;) We work SO WELL together:):) And let me tell you, I think I’ve taken more tubs than I have showers…so there Ry guy:)
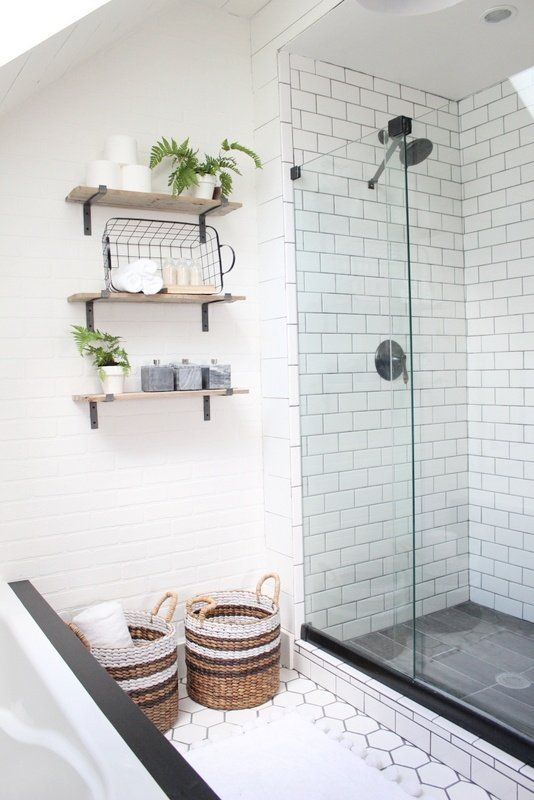
Anyway, the shower didn’t end up huge, but it seems super spacious inside.
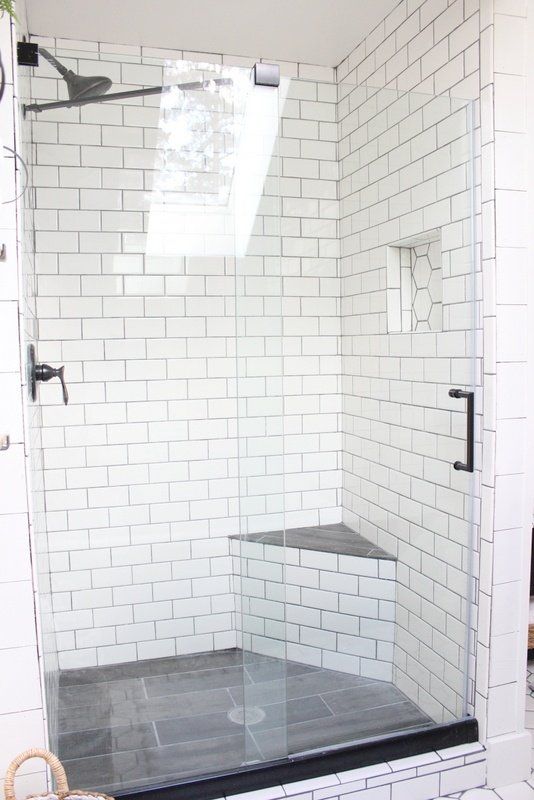
The glass door may have had something to do with that…
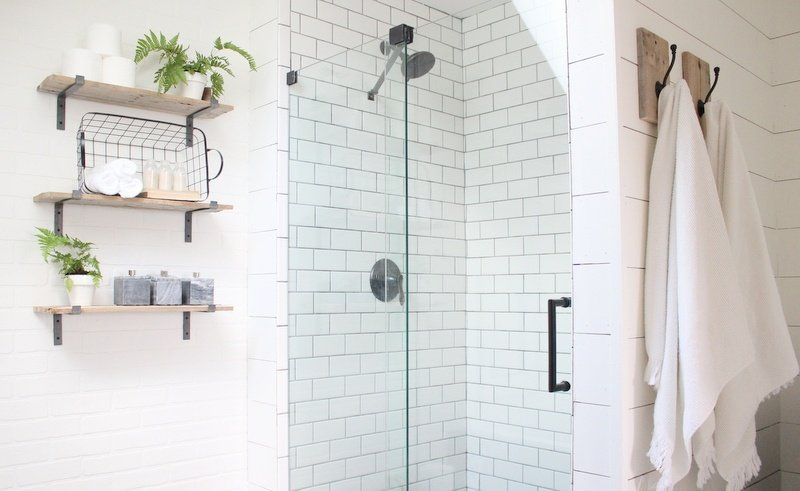
Which we purchased the glass shower door on Overstock. The nice thing about this shower door is that the door slides, so it doesn’t eat into the floor space. And also it was expandable, so we had a little room to play with our shower dimensions. It was made to fit a 44″-48″ opening, so we didn’t have to freak out and be exact on our measurements for the actual shower stall. If you checked out the door on overstock, you will realize that it only came in chrome or brushed nickel. Yeah, that wasn’t happening..
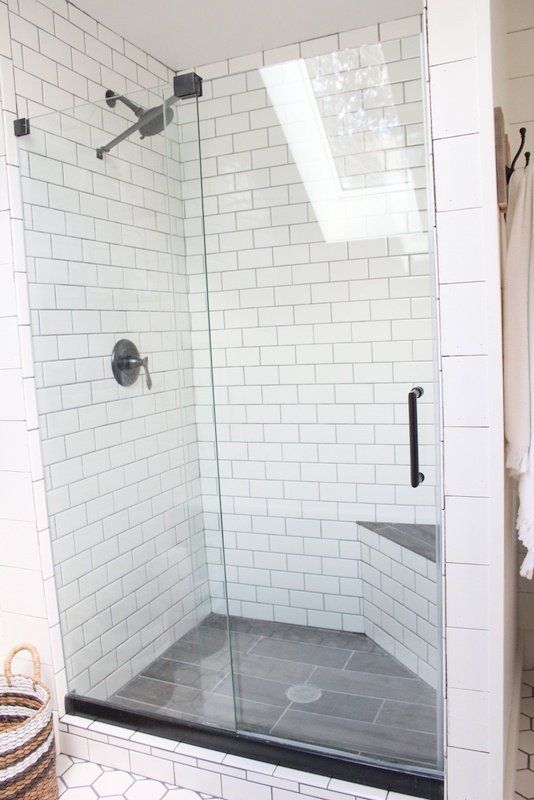
so I actually spray painted all of the metal black. Yep, it was brand new and I took the spray paint to it. I honestly was waiting for Ry to freak out and tell me no, but he didn’t say a word. Gol that boy is starting to trust me;) Anyway, I like it WAAAAYYY better black and it fits our look much better. And you guys….shower doors are EXPENSIVE! This was definitely a splurge for us over a cheap curtain rod. But if you are going to put in a tile shower…which again isn’t the cheapest, you might as well finish it off to show off your tile right?!? The door with a coupon ended up being $575, which is waaaaayyy cheaper than a custom glass shower door. And we are SUPER impressed with the quality. It’s nice and heavy duty and feels super solid. They do have the support bar to help anchor the glass, and at first I wasnt sure if that was going to bug or not, but I really don’t mind it.
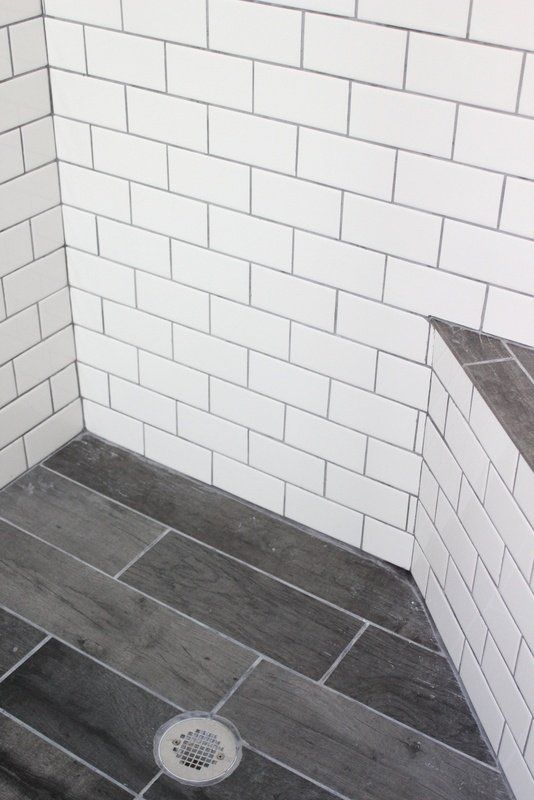
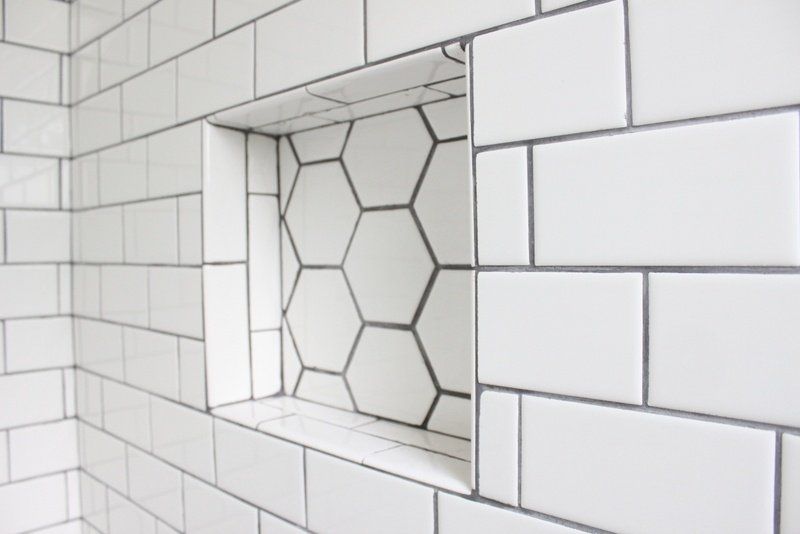
We ended up using just the super cheap 4″x6″ subway tiles from Menards for the walls, and then we found this faux wood grey tile at menards for the floors. We ended up cutting some shorter to help with the slope, but it ended up working out really well. They went in super fast and they were also very inexpensive! We used the leftover floor tile for our little cutout in the shower.
and lets talk about how nice it is to have a little seat in the shower, if for nothing else than a foot rest to shave your legs:)

We seriously just learned as we went with this project. I looked at a gazillion pics on instagram of subway tile showers to see how to lay the tiles, and how to do the edges, and the cutout, and I realized that really it’s all preference. So just go with what you like! And subway tile is super forgiving…praise the Lord! We did use spacers in here to make the grout line extra chunky which I love. And we used grout in the color pewter.
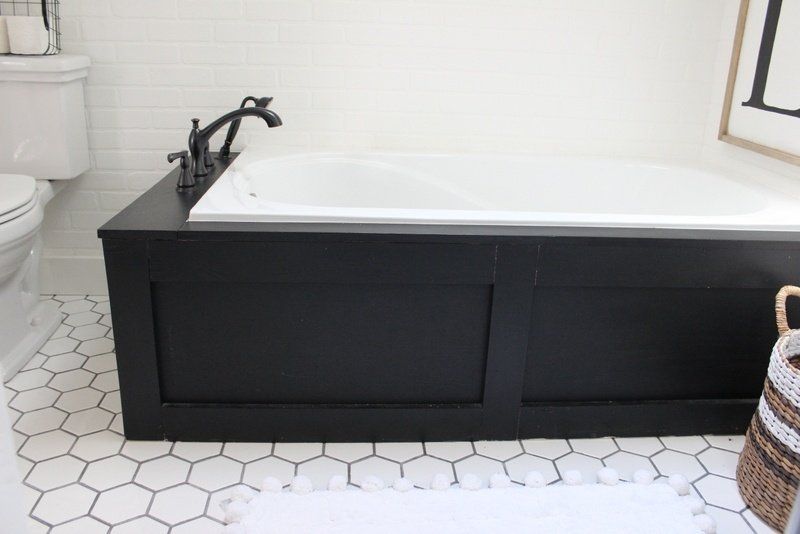
So enough about the shower. Lets talk about my tub;)
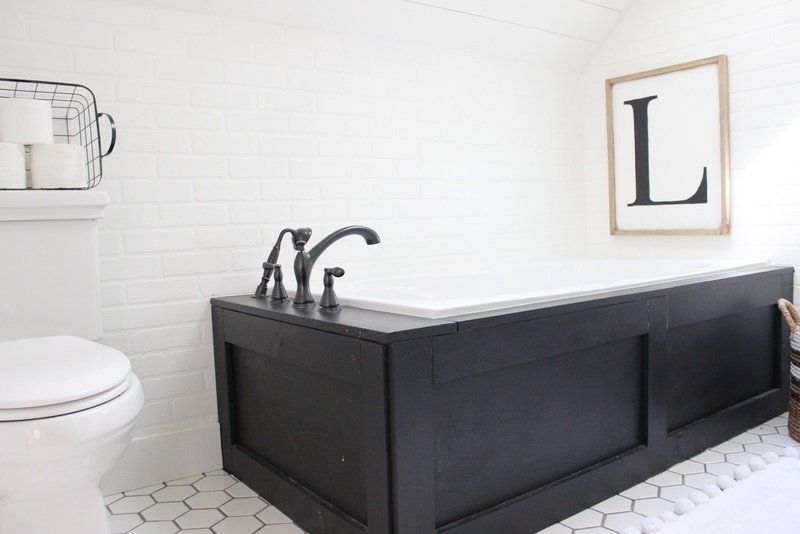
This tub was actually a mistake, and it was a mistake that I love. We ordered the tub that just had the solid white fiberglass front that cascaded over the side, so there would have been no surround. When we opened the box up, it was a drop in tub. Ry was a bit frustrated because it meant more work for him, but I was clapping inside knowing it would now be able to look more custom since we could choose our surround. And never going into this bathroom project did I think I’d have a black tub. That’s what I love about design….you can have a plan and then as it unfolds it evolves and changes!
And now I love my dramatic black tub.
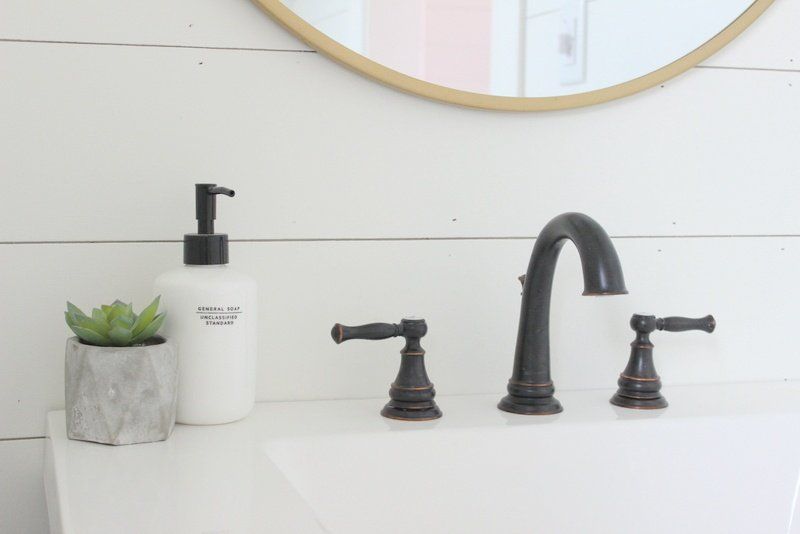
We got the roman faucet from Menards. I just wanted one that had a sprayer, because I do love to take tubs, and so I do want to be able to wash my hair in the tub. And lets talk about how nice it is for the kids…and for rinsing the tub out when you are done! Faucets are another accessory that can be a major splurge. Holy moly they get pricey. And although I’d LOVE some super unique pretty faucet, we didn’t have the budget to spend on that. So all of our faucets came from big box stores.
If you noticed we used the faux brick paneling in here as well, on the west and north walls. It was either that or subway tile…and although I love subway tile, this was just easier and cheaper;)
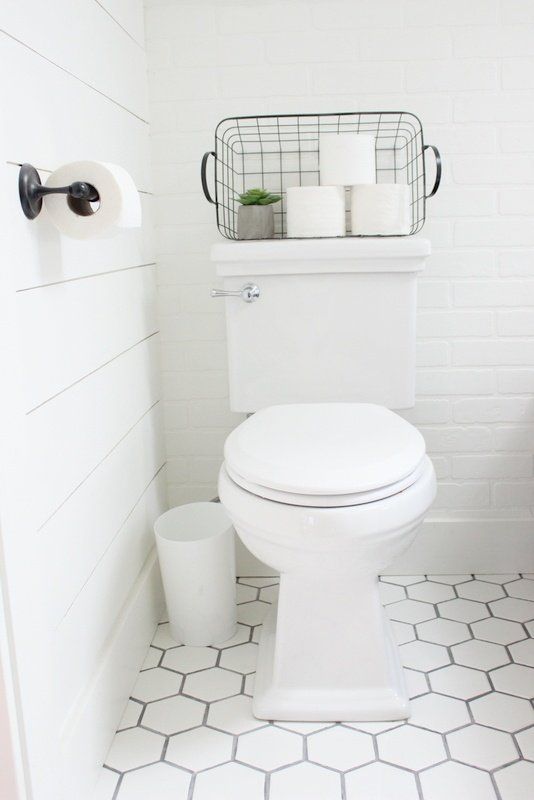
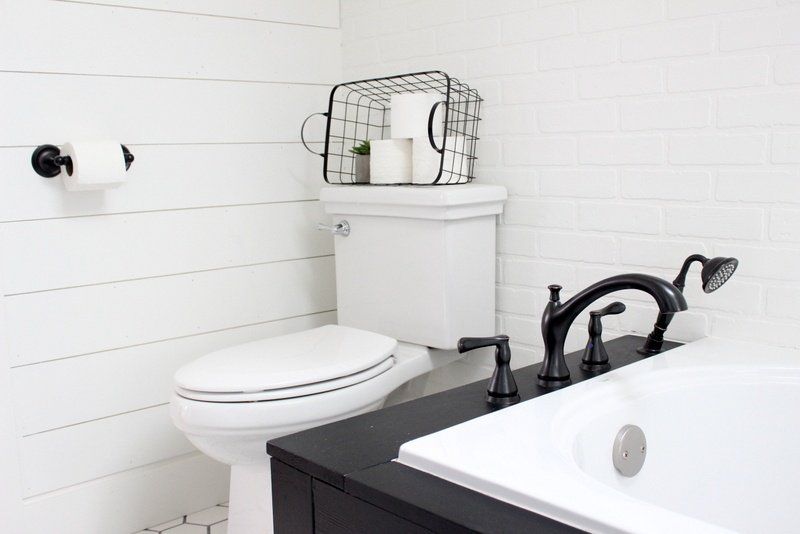
Our toilet was ordered through Ferguson and it’s Mirabelle brand. I believe the name of it is the Key West toilet in white. And my little black basket that I set there when we first moved in hasn’t gotten replaced;) It was a $5 wire basket from the Target aisle, and it’s perfect to hold extra t.p. ;)
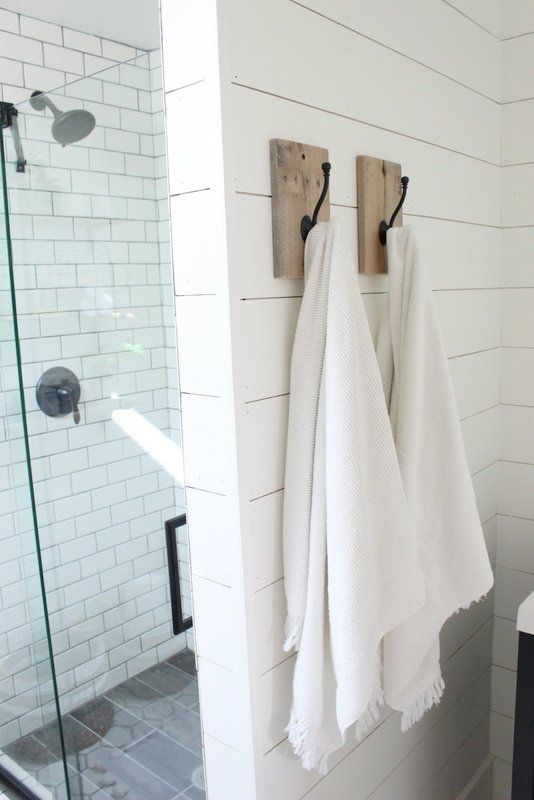
We really don’t have any extra storage in this bathroom, so having hooks for towels was essential. I just bought these hooks off of amazon and screwed them onto some of our pallet wood we had. The towels are from Target.
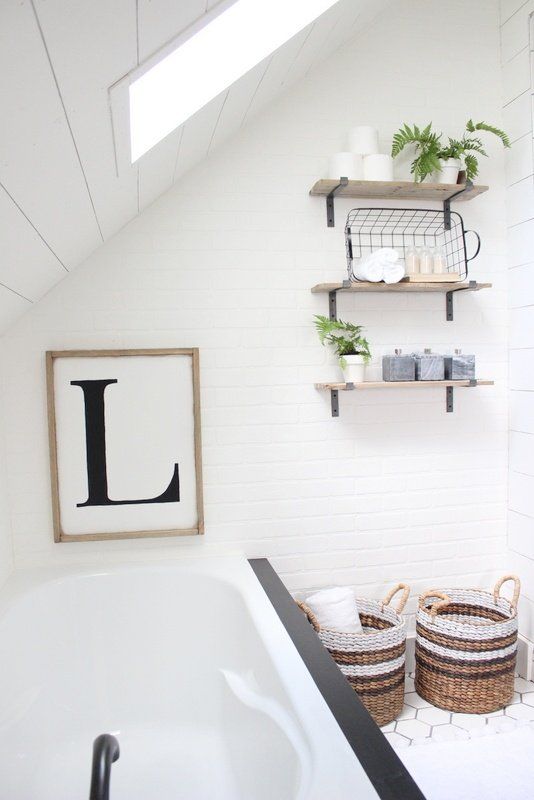
I also made these shelves using brackets I bought off of ebay. They offer them in all depths, but I ended up choosing the 8″ ones so it didn’t go past our little wall of the shower. I used the same pallet wood we had for the actual shelf.
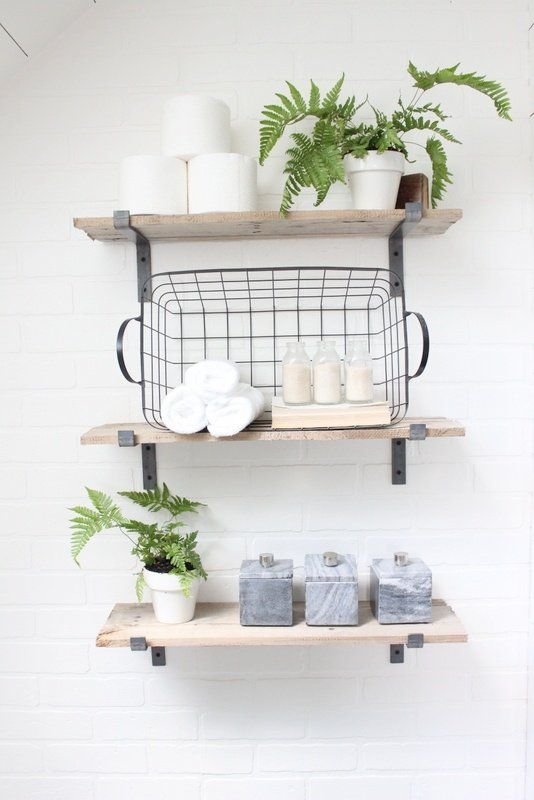
They don’t fit much (trust me, ry wasn’t happy about that;) but they do bring a lot of texture into this white space, which was my goal;) haha..don’t worry ry, I’ll find a different spot for towels!
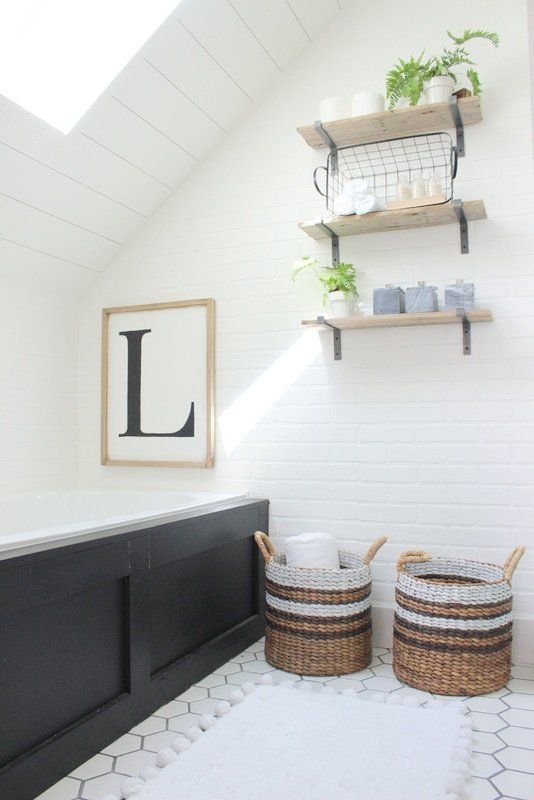
which we do keep in the basket. The other basket is for dirty clothes..which come in handy for easy clean up in the bathroom. The other thing I love that we did in here was to add this sky light. We really ended up only paying $150 for it, and it seriously was the best money spent. It brings in so much natural light, and give quite the pretty scenery from the shower;)
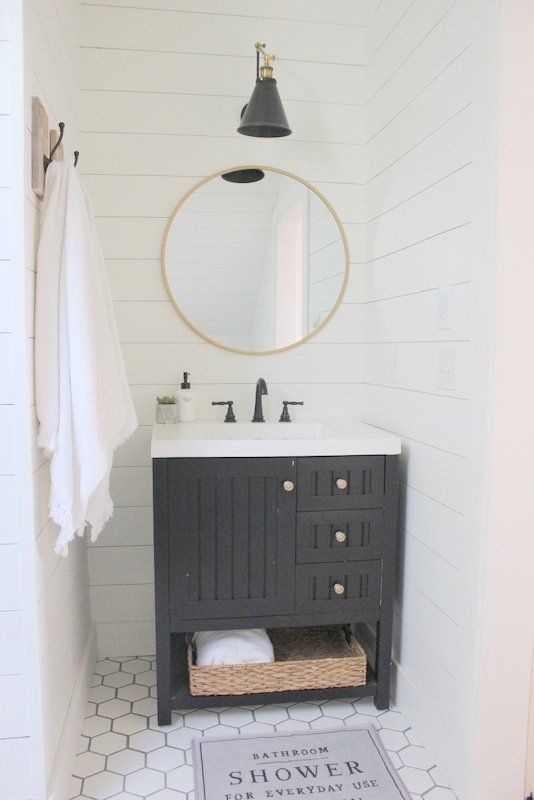
The last spot is the vanity..
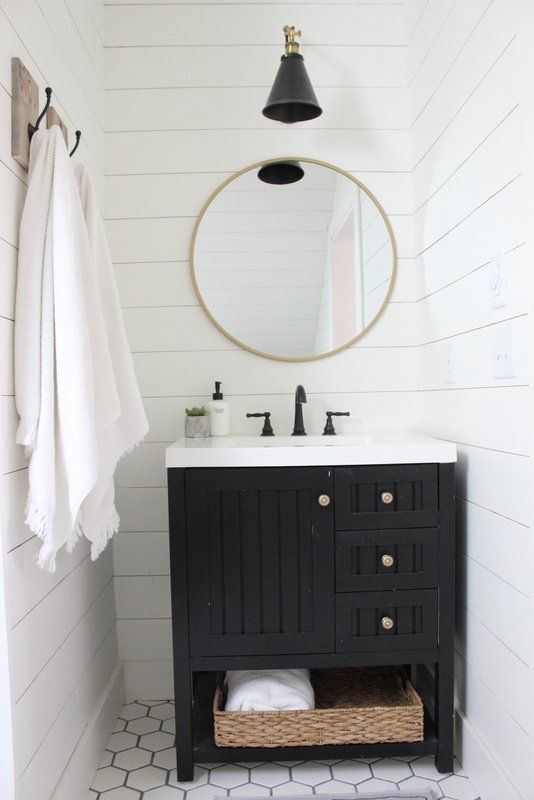
This little guy is from Home depot, and it is the Martha Stewart seal harbor vanity. We bought it new and it actually was in the sharkey gray color of my kitchen cabinets with polished nickel hardware. I was going to use it as that color until again, the gray just didn’t go with the way the plan was unfolding. So I PAINTED the BRAND NEW bathroom vanity black, and sprayed the hardware gold. So many people are afraid to paint new, or wood, or anything for that matter. And in my mind I don’t care what it is as long as it gets me the look I want. Ry being a saint again didn’t say anything and let me paint;) It still needs one more coat someday…but for now it’s good enough! I know some people probably think we are crazy for not doing a double vanity in here. And although more countertop space would have been nice, it was more important for me to have a decent size shower and a tub. And honestly the only time Ryan and I get ready at the same time is on sunday mornings. And lets be real, it only takes him 2 minutes to brush his teeth and put in his hair gel and he’s done with the mirror. So a single vanity really wasn’t a huge sacrifice for us:)
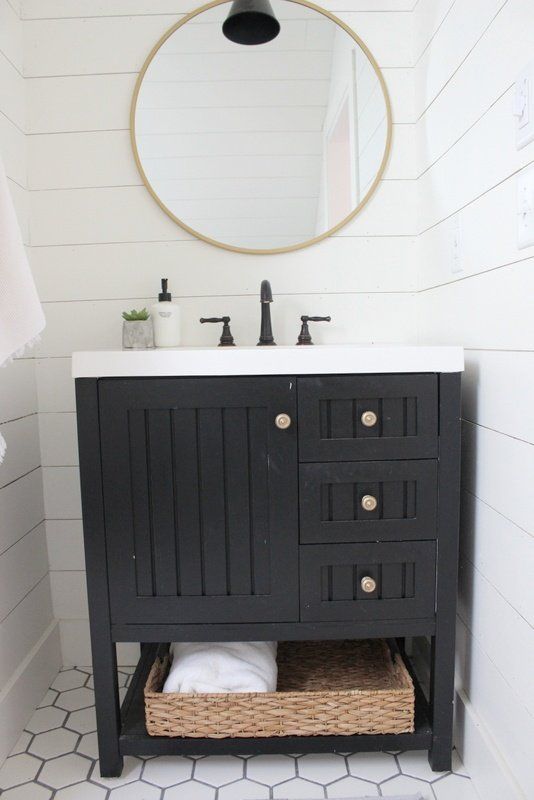
The mirror came from target, and the light above the vanity is from ebay! It seriously was $19.99. Lighting is one area I am always cheap on! Again…lights can be soooo expensive! But you can usually always find a similar look for waaaaayy cheaper, and this just proves that!
I found this cute little soap dispenser from h&m home, and our faucet came from Home Depot.
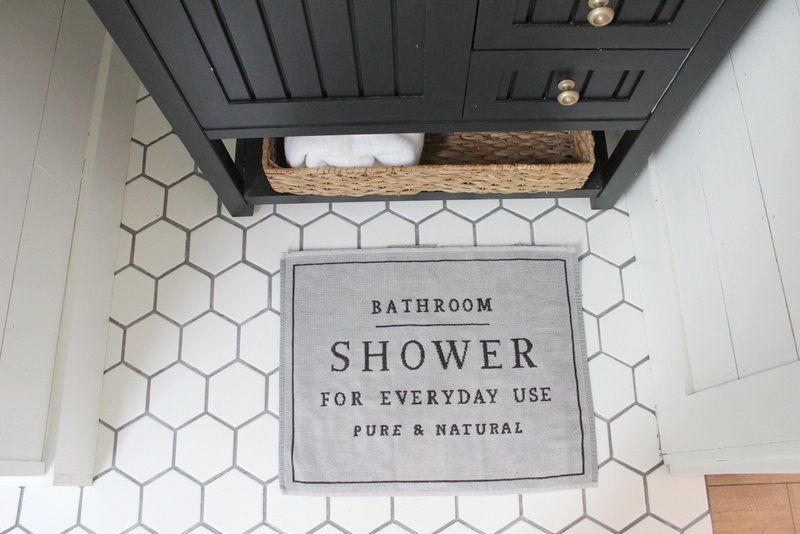
This bath mat is also h&m home… and I kinda love having something warm on my toes in the winter;)
So there you have it. Our not too spacious, but just perfect for us master bath.