BUFFET — BEFORE & AFTER
I’ve been working on a mini makeover on our dining room these last couple months, and I’m hoping to do the full before and after reveal soon, but one of the pieces that I wanted to add to the dining room was a buffet. I originally had my big hutch in here…
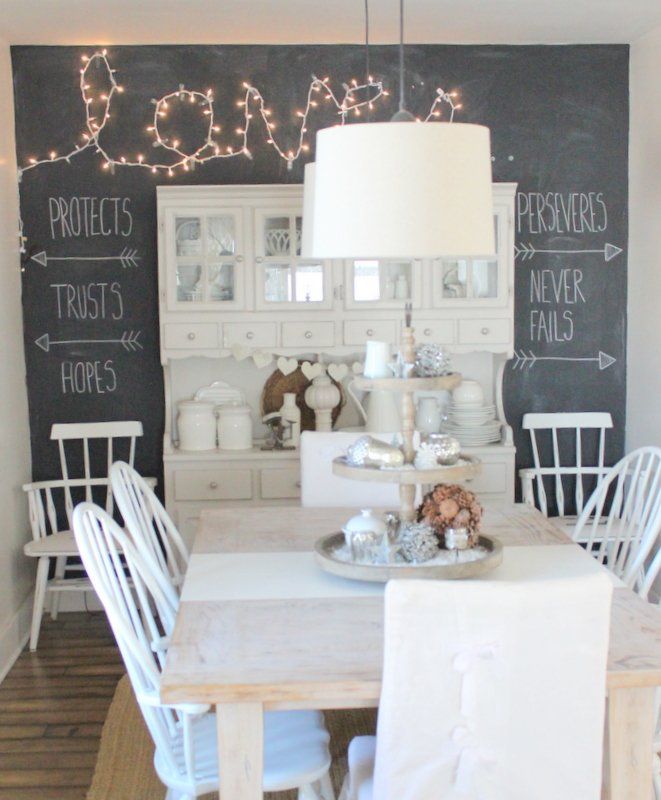
but have since sold it at a Whimsy sale. Although I liked it, it was a bit more country than I wanted to go. It had served our house well, and the beautiful thing about whimsy is that I don’t usually loose money on swapping out pieces of furniture. I have gotten rid of the chalkboard wall and added board and batten, and my plan was to find a big “window” type mirror to put on the back wall to reflect some light since there is no windows back there. I wanted the mirror to hang above a buffet, and after convincing myself I was just going to go to a furniture shop and buy a piece of furniture….I got sticker shock! It’s been awhile! I couldn’t find a decent buffet that I liked for under $800, and I just wasn’t willing to pay that!
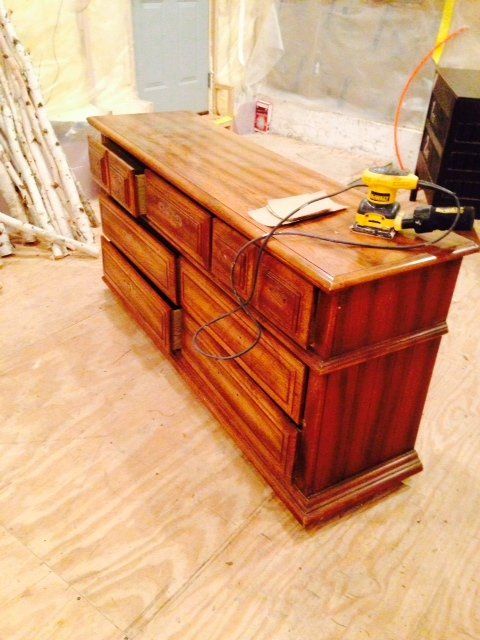
So, I had been to an auction a few weeks prior and picked up this dandy for a whopping $10!

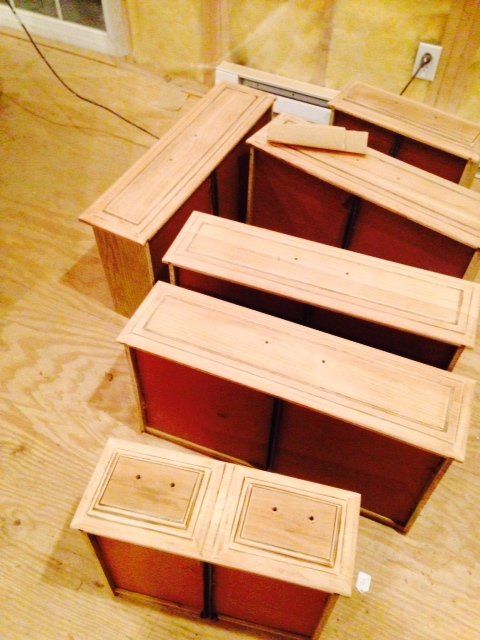
I wished I would have taken the picture of it before I took off the hardware, because the hardware was “special” :) to say the least! It was huge and heavy brass that completely dated this piece.
The dresser had a real orange and honey color to it….
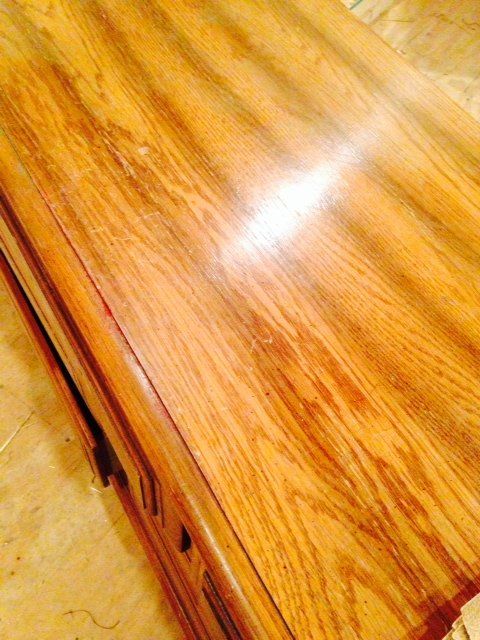
and although it needed a lot of work, I saw it had a LOT of potential! It was the perfect size for my space, it was solid wood, and it had great character under all of that shellac:)
so out came the palm sander! I hate completely sanding down furniture unless I have too, which usually means unless I want it for my house and am going to save $700+ dollars on a boughten piece. And although the character is what sold me on this dresser, it was a beast to sand down.
not to mention super dusty!
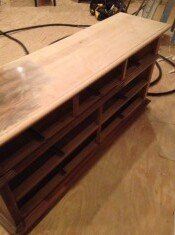
I worked on it two different nights for about 2 hours each time, which doesn’t sound like much, but it’s just not a fun job.
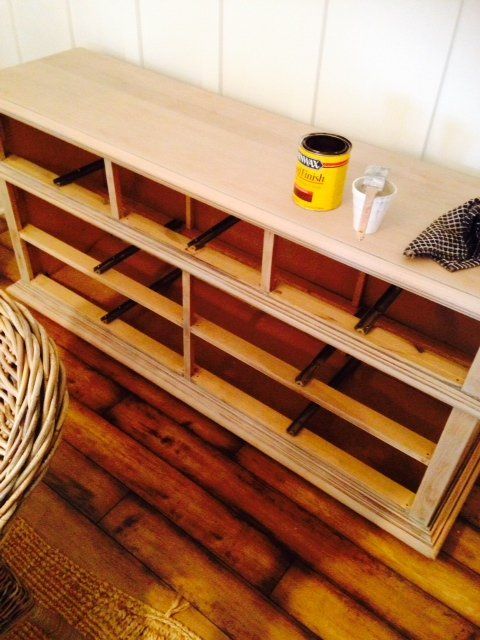
Finally I was ready to bring it in the house and stain it. It’s always trial and error when I’m trying to get a color I want, and for this piece I really wanted the gray, driftwood color that is so in right now.
I started by taking a styrofoam cup and filling it half full with American Accents “stone gray” paint.

You can find it at Menards by the spray paint:)
Then I filled the rest of the cup with water and mixed it together. I ended up with a stain-like consistency that I could brush on and rub in with a rag, and also wipe off the excess. I would paint on a whole drawer front and then wipe it off, but on the top I broke it into thirds and did one third at a time so the paint didn’t sit on there too long. Here’s what it looked like when I finished that step.
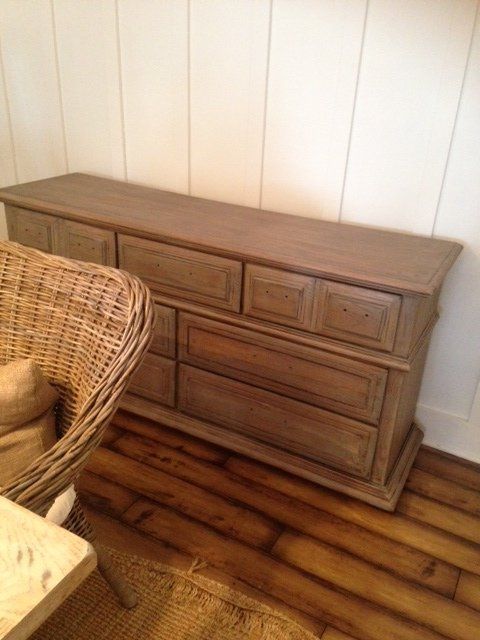
Although I liked how it looked, it was a little too white washed effect for me. I wanted a little more depth. So then I messed around and tried the Minwax driftwood gray stain over top of it. It really did nothing . I want to tell you all the steps I did because so much of furniture reno is just trial and error. After that didn’t work I took out my Minwax Dark Walnut stain..

I used a sponge brush to brush it on and then rubbed it off with a rag. I was nervous at first that it would be too dark, but since I didn’t the half paint/half water treatment right before, it didn’t soak much up, and almost beaded a little. The effect it gave was just perfect though.
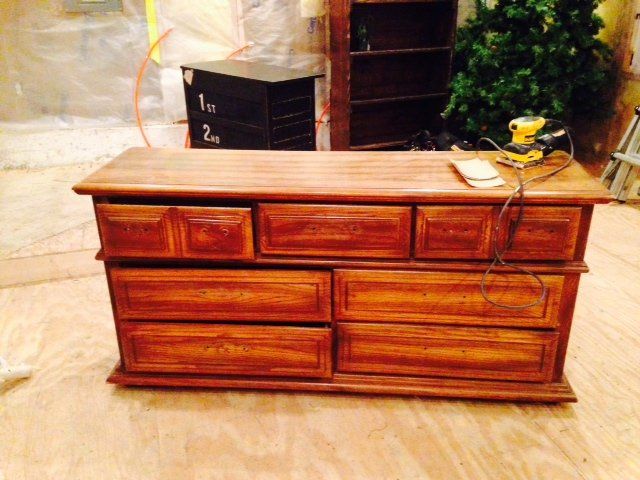
Here was how it looked right after with my iphone pic
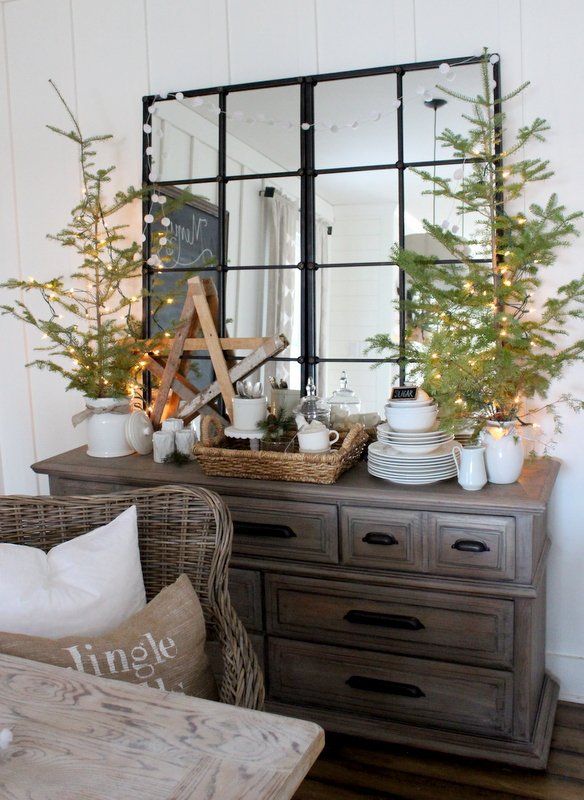
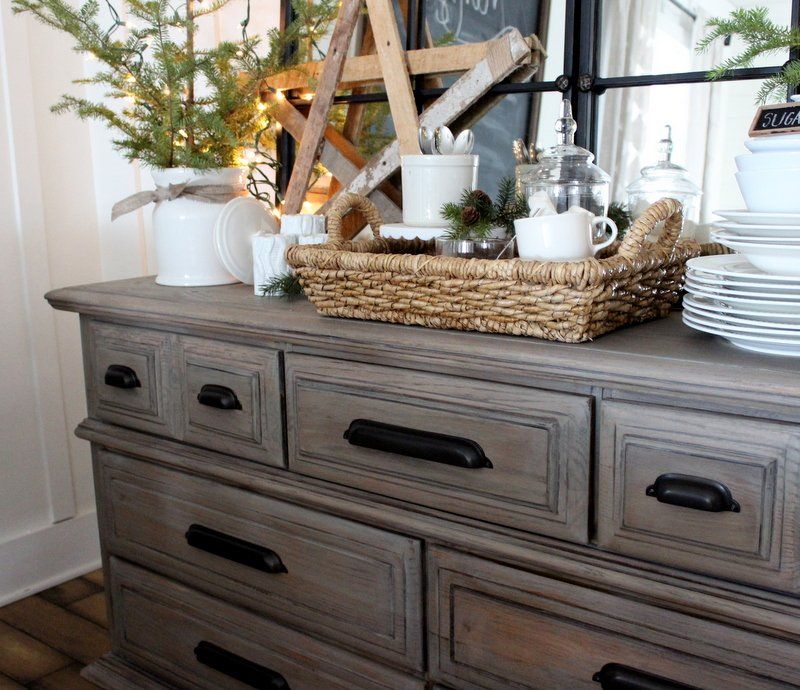
It ended up matching the new IKEA chairs I got just perfect! I took my christmas home tour photos with it done but no hardware on it.

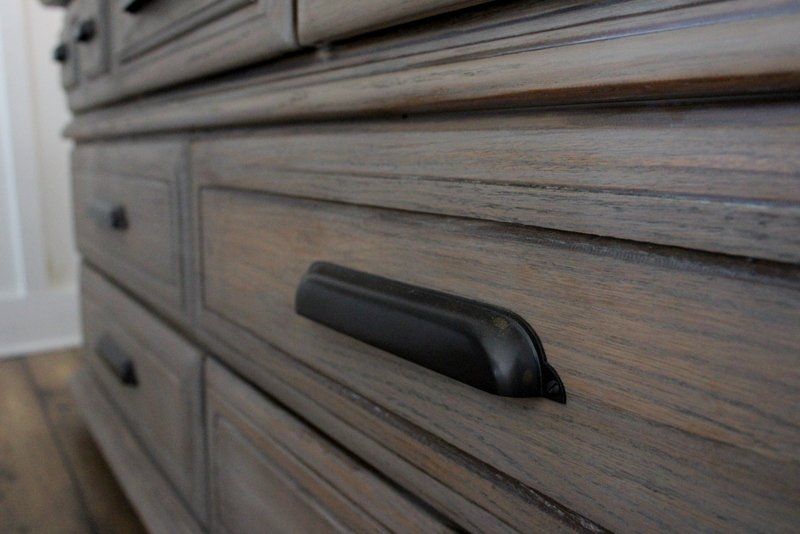
Since I only paid $10 for the dresser, I was able to buy the mirrors from Ballard Designs plus the dresser for the price I sold my hutch for. The mirrors at the time were on their Bring Home Ballard special and were the best deal I could find for the size that they are! We are still going to hang them, right now they are just leaning, but they are so heavy I have to pull the hubs in to help with that one! I since ordered and put the hardware on my buffet as well. Again, since I got the dresser for such a steal, I wanted to invest in nice hardware. I really wanted the cup pulls to make it more cottage feel, but needed to different sizes that matched. I had a hard time finding them but ended up with a great option at Pottery Barn.

these 3″ pulls were perfect for the top drawers.
and I loved these 9″ pulls for the big drawers.
Their hardware is free shipping which helped, and then I ended up buying two $10 off of $50 coupons on ebay for $3 and ordered my pulls in two separate orders so I saved $17. All 9 pulls ended up costing me around $90, which still made this piece of furniture a steal for $100.
So, heres the before….
and after…

I just took out my red but left the greens, because here in the midwest spring is still a loooooooonnnnnngggg way off :)
And twinkle lights help with the dark nights:)
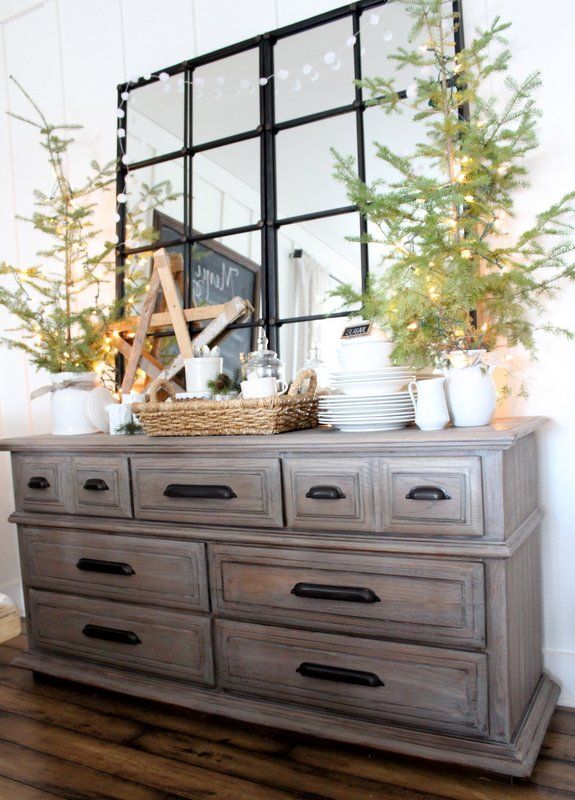
and that’s why I love those mirrors as well, they reflect so much light!
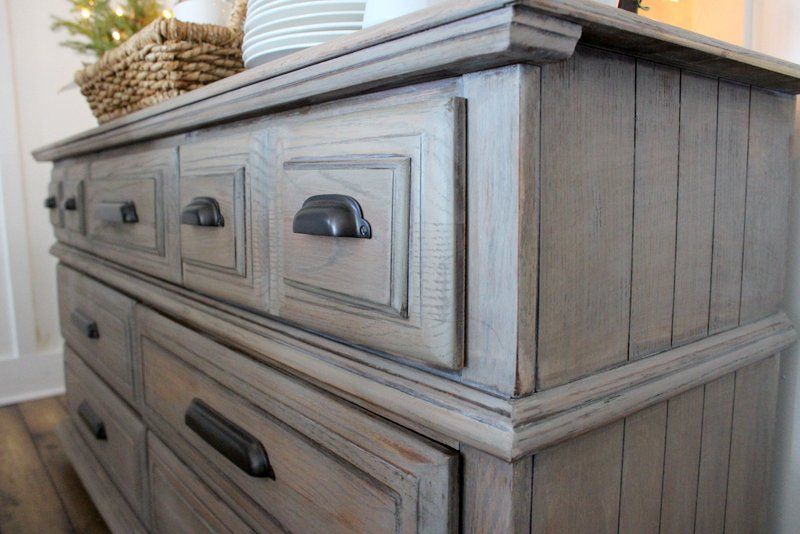
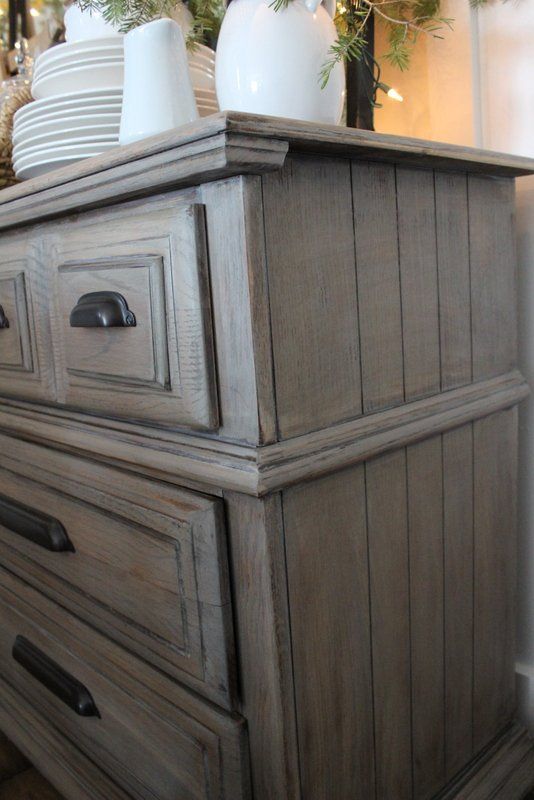
I love that the grain of the wood still shows through..
and that there is still variation in the color.
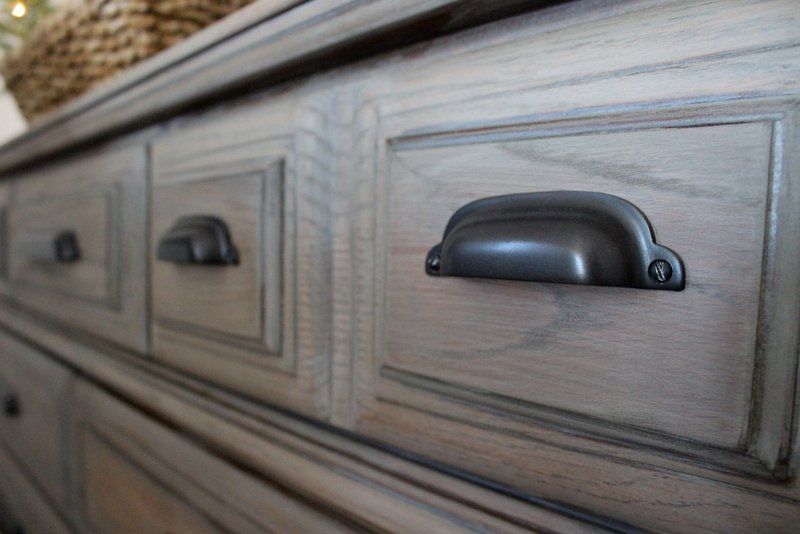
and this hardware was totally worth the cost.
I had to show you the end of this piece because the character is so pretty! That’s why when you see a piece of furntiure at a garage sale, or estate sale, or craigslist, you have to look past the color/hardware/stain, and look at the character, lines, ridges. Those are the parts of a piece of furniture that makes it so pretty at the end, whether staining or painting.
So there you have it, my $10 dresser makeover.