DIY–Painted Curtains
It’s true, I tried it. I was reading a magazine while Ryan and I were in Florida and read about a lady who painted her drop cloth curtains, and they looked great. If you google painted curtain images, it’s amazing how many pictures you will find. So, I was on a mission.
I orginally fell in love with these curtains…
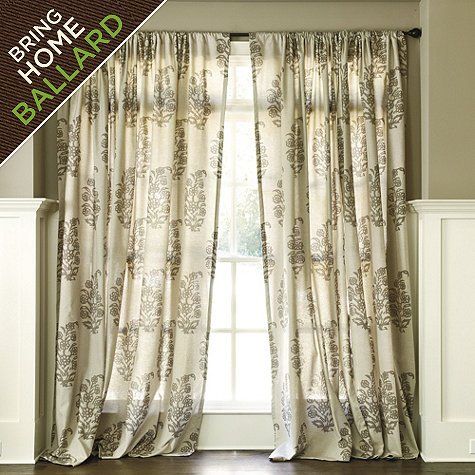
source
But at $99 a panel (enter gasp here) it just wasn’t going to happen. I started looking online for different stencils I liked and end up finding this one..
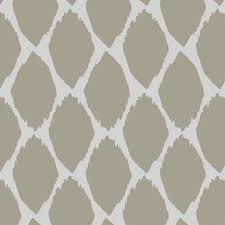
I liked that it looked like it would be easy to paint.
Let the work begin.
First, I used Saran Wrap to lay down a barrier between the fabric and my wood floor. I have learned from other projects that paint seeps through drop cloth quite easily.
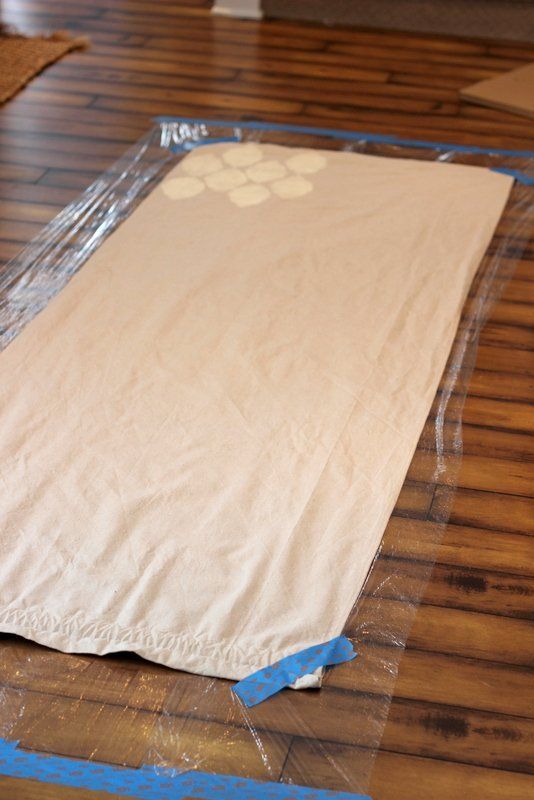
Gotta love that painters tape to help hold everything in place:)
I used the cheapest white paint I could find and a small foam roller.
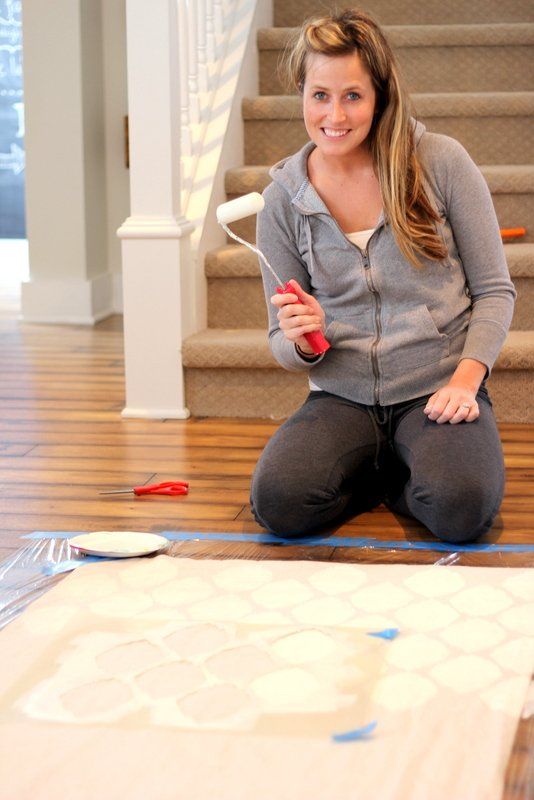
Yes, this is how I usually look when I’m doing projects. No make up and comfys.
I bought this stencil to also use for some Whimsy crafts. I got it from StencilEase and upgraded to a little bit thicker stencil for durability. I think it was around $25. Not bad for being able to use it again and again.
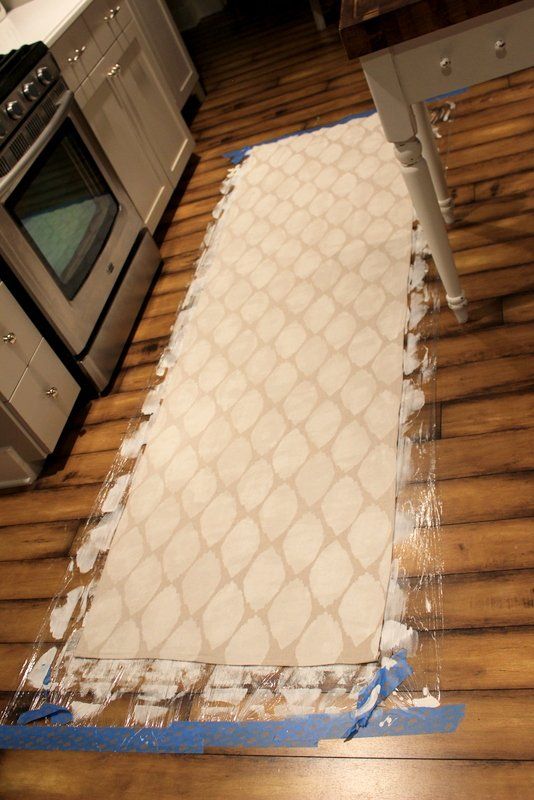
I just overlapped a couple of the ikat patterns when I moved it to make sure everything lined up.

It really used a lot more paint than I expected, and you had to push quite hard to get it to soak in evenly. This project was definitely a labor of love, but oh so cheap. Cheap wins every time.
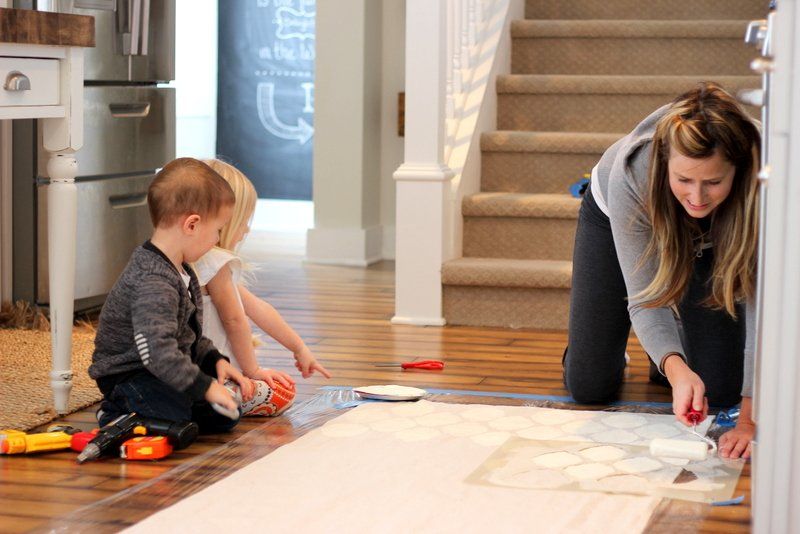
Plus I had a GREAT cheerleading squad:)
Once I was finished I actually hung them on the rod to dry. They were quite wet on both the front and back so you have to transport them carefully:)

The first panel took me about an hour….but once I got it down I got it to about 1/2 a panel. Really, that’s not bad…it was just the aching shoulders and back that were a bit of a bugger.
But, I think the results were worth it.
Here’s the before…..
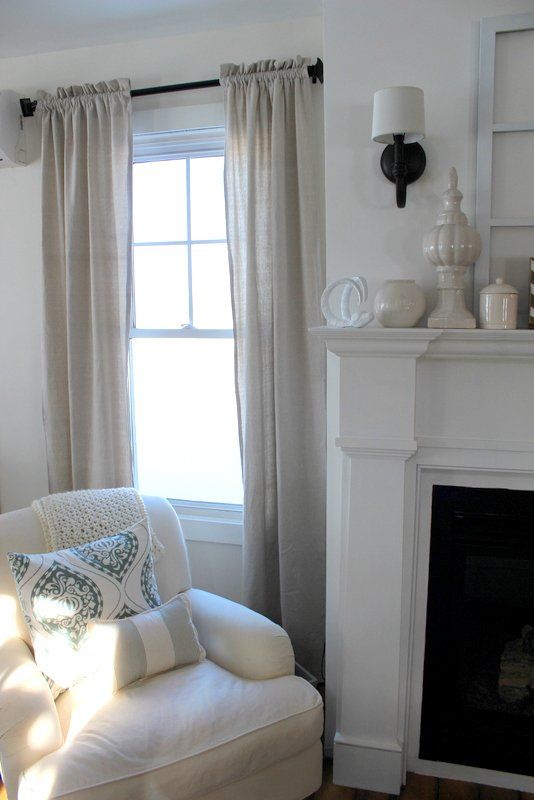
My $10 drop cloth curtains that have been up for a year now.
and after….
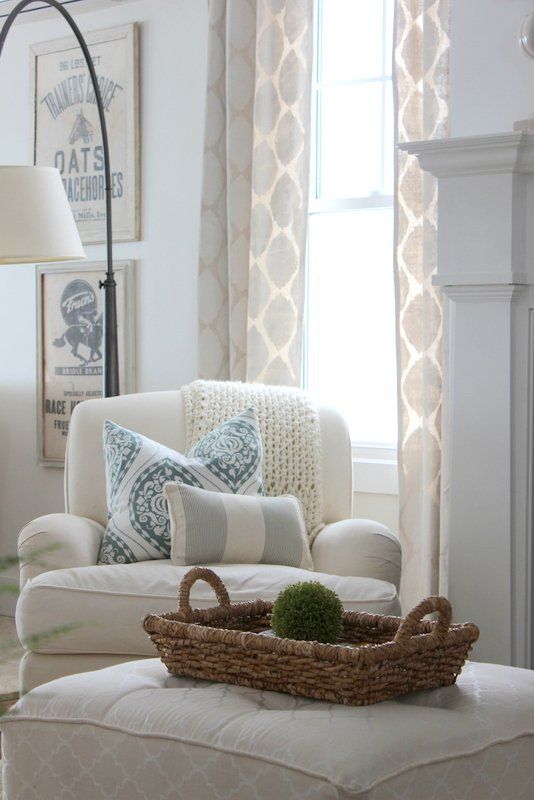
I love how subtle it is but still adds pattern..
Once again, my fear of color wins:)

See that fun sign on the mantel? There will be a post on how to make one of those too:)
A couple of things to know about the curtains.
1.) I used a gallon of paint on 6 panels, it takes more than you think.
2.) I did not add the fabric additive you can add so they are washable, but I never wash my curtains..eek!
3.) They are a bit stiff, but we never closet these curtains. I do close the ones in my living room, and they close, just a bit stiff:) It doesn’t bug me but it may bug some of you??? They don’t look stiff at all. It’s our little secret:)
** There has been quite a bit of questions from this post so I thought I’d add in a few of the sources of where I purchased everything.
I bought the chair from an online auction but it is a Room & Board chair, I didn’t even realize that til I went to go pick it up, score!
The ottoman I recovered, and the fabric came from here.
I made the pillow, and the fabric is from here.
I got the vintage feedsacks again on an online auction, but found a great tutorial of how to make them yourself here.
I think that should do it, thanks for all the great feedback and questions!