Planked Fireplace
Remember way back when we first put the fireplace in and I had this inspiration picture from Better Homes and Gardens….
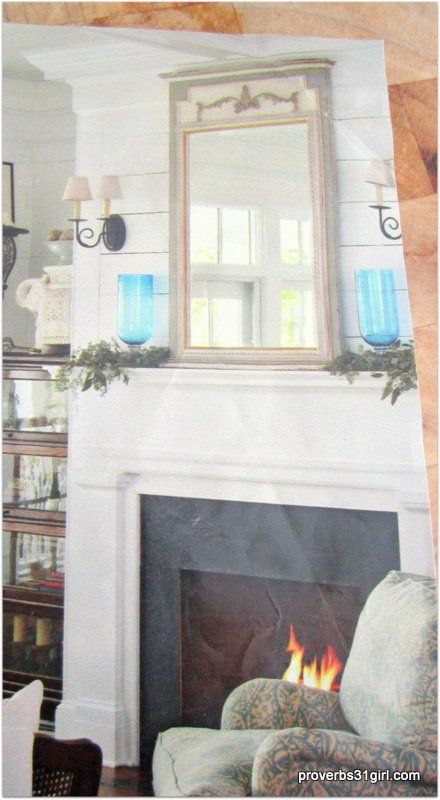
Sorry for the bad picture…it’s all I had:) But..I loved everything about this fireplace. The mantle, the planking, the big white trim. I mean LOVE. It would be in my category for dream fireplace. At the time mine looked like this…

I love looking back at old pictures, it reminds you so much of how things evolve! So, here was my fireplace when I threw up a mantle shelf I had from the old house, just so I could put something on it. And at the time it was perfect. We had so many projects going on that this was easy and free, all we could do at the time.
Then I went on an online auction that I have bought quite a bit of stuff from and found a mantle so close to the inspiration pic I was giddy. I ended up “winning” it I think for $165.00. Considering it retailed for $750.00, that was a steal of a deal at 90% off, even if Ry did have to Magiver it a bit since it was a foot too long. Pretty soon I had a mantle like this…

This was also pre-good camera days:) We still had a little work to do on her, but she was beautiful. And for now, this was as close to the inspiration pic as I was gonna get.
But then I started seeing all of these DIY posts pop up in the blog world about planking your walls. Planking just like my inspiration pic. And I thought, I can do that. So, I went to the Home Depot and bought some 1/4″ smooth plywood. I’m not exactly sure what it was called, but it looked like this…

And what’s awesome is that is it is only about $12 a sheet, so I only needed about $30 worth to do my whole fireplace.
I had the Home Depot guys cut it into 5″ strips for me, free of charge. Gotta love that. Now I was ready to start planking…

I had learned a good trick in the blogging world about using a nickel for spacing, so that’s what I did. For the first few rows anyway, then you start to get the hang of it…

I also used a few dabs of drywall glue on the back of the wood, to help hold it in place…

once I got to the lights I had to take them down to measure and draw my circle on my wood as to where they would go…

I then used the jigsaw Ry has and cut out the shape. It didn’t have to be perfect, that’s what caulk is for…it just had to be close:)

Did I mention I did this a day that Ry went fishing…so he didn’t have to witness my methods and mess:) But he did know I was doing it, and hauled in the tools for me. No surprises this time!
This is the caulk I used to fill in my nail holes. It doesn’t matter what kind you use as long as it is PAINTABLE. We have made that mistake many times and it is not fun!

So when I finally got finished nailing my planks up and putting on a coat or two of white I got this…

If I were to do this again I would have painted at least my edges first, it was a pain to try to get in the crack to paint them and then you had spots that got filled up with paint. So for those of you that may try this, learn from my mistakes:) I ended up using a knife to clear all the paint out of the cracks….
Then the hubby comes home and I’m grinning ear to ear and he says it looks like the whole fireplace is crooked. :( It was true, the last 2 pieces I put on were a half an inch different from one end to the next. The guy cut two boards at once and so not all the measurements were perfect….and I knew they wouldn’t all be. But this one did need some fixing.

Off they came (I hate redos) and new ones that weren’t so crooked went up…

better.
This is as far as I got before leaving for Wisconsin for a week, so of course even though it wasn’t finished, I had to decorate it just to see:)

Yep, I loved it.

even with the rough edges:) I had fun playing around with my summer stuff too!


Once I got back from Wisconsin I was feeling motivated to get the job done. I used the same 1/4 inch plywood to put on the sides and finished trimming out around the fireplace…

and the sweet hubs put up the crown for me. I wasn’t quite ready to tackle that yet!
We had bought crown for this project quite a few months prior but it was one of those things…we’ll get to it someday..

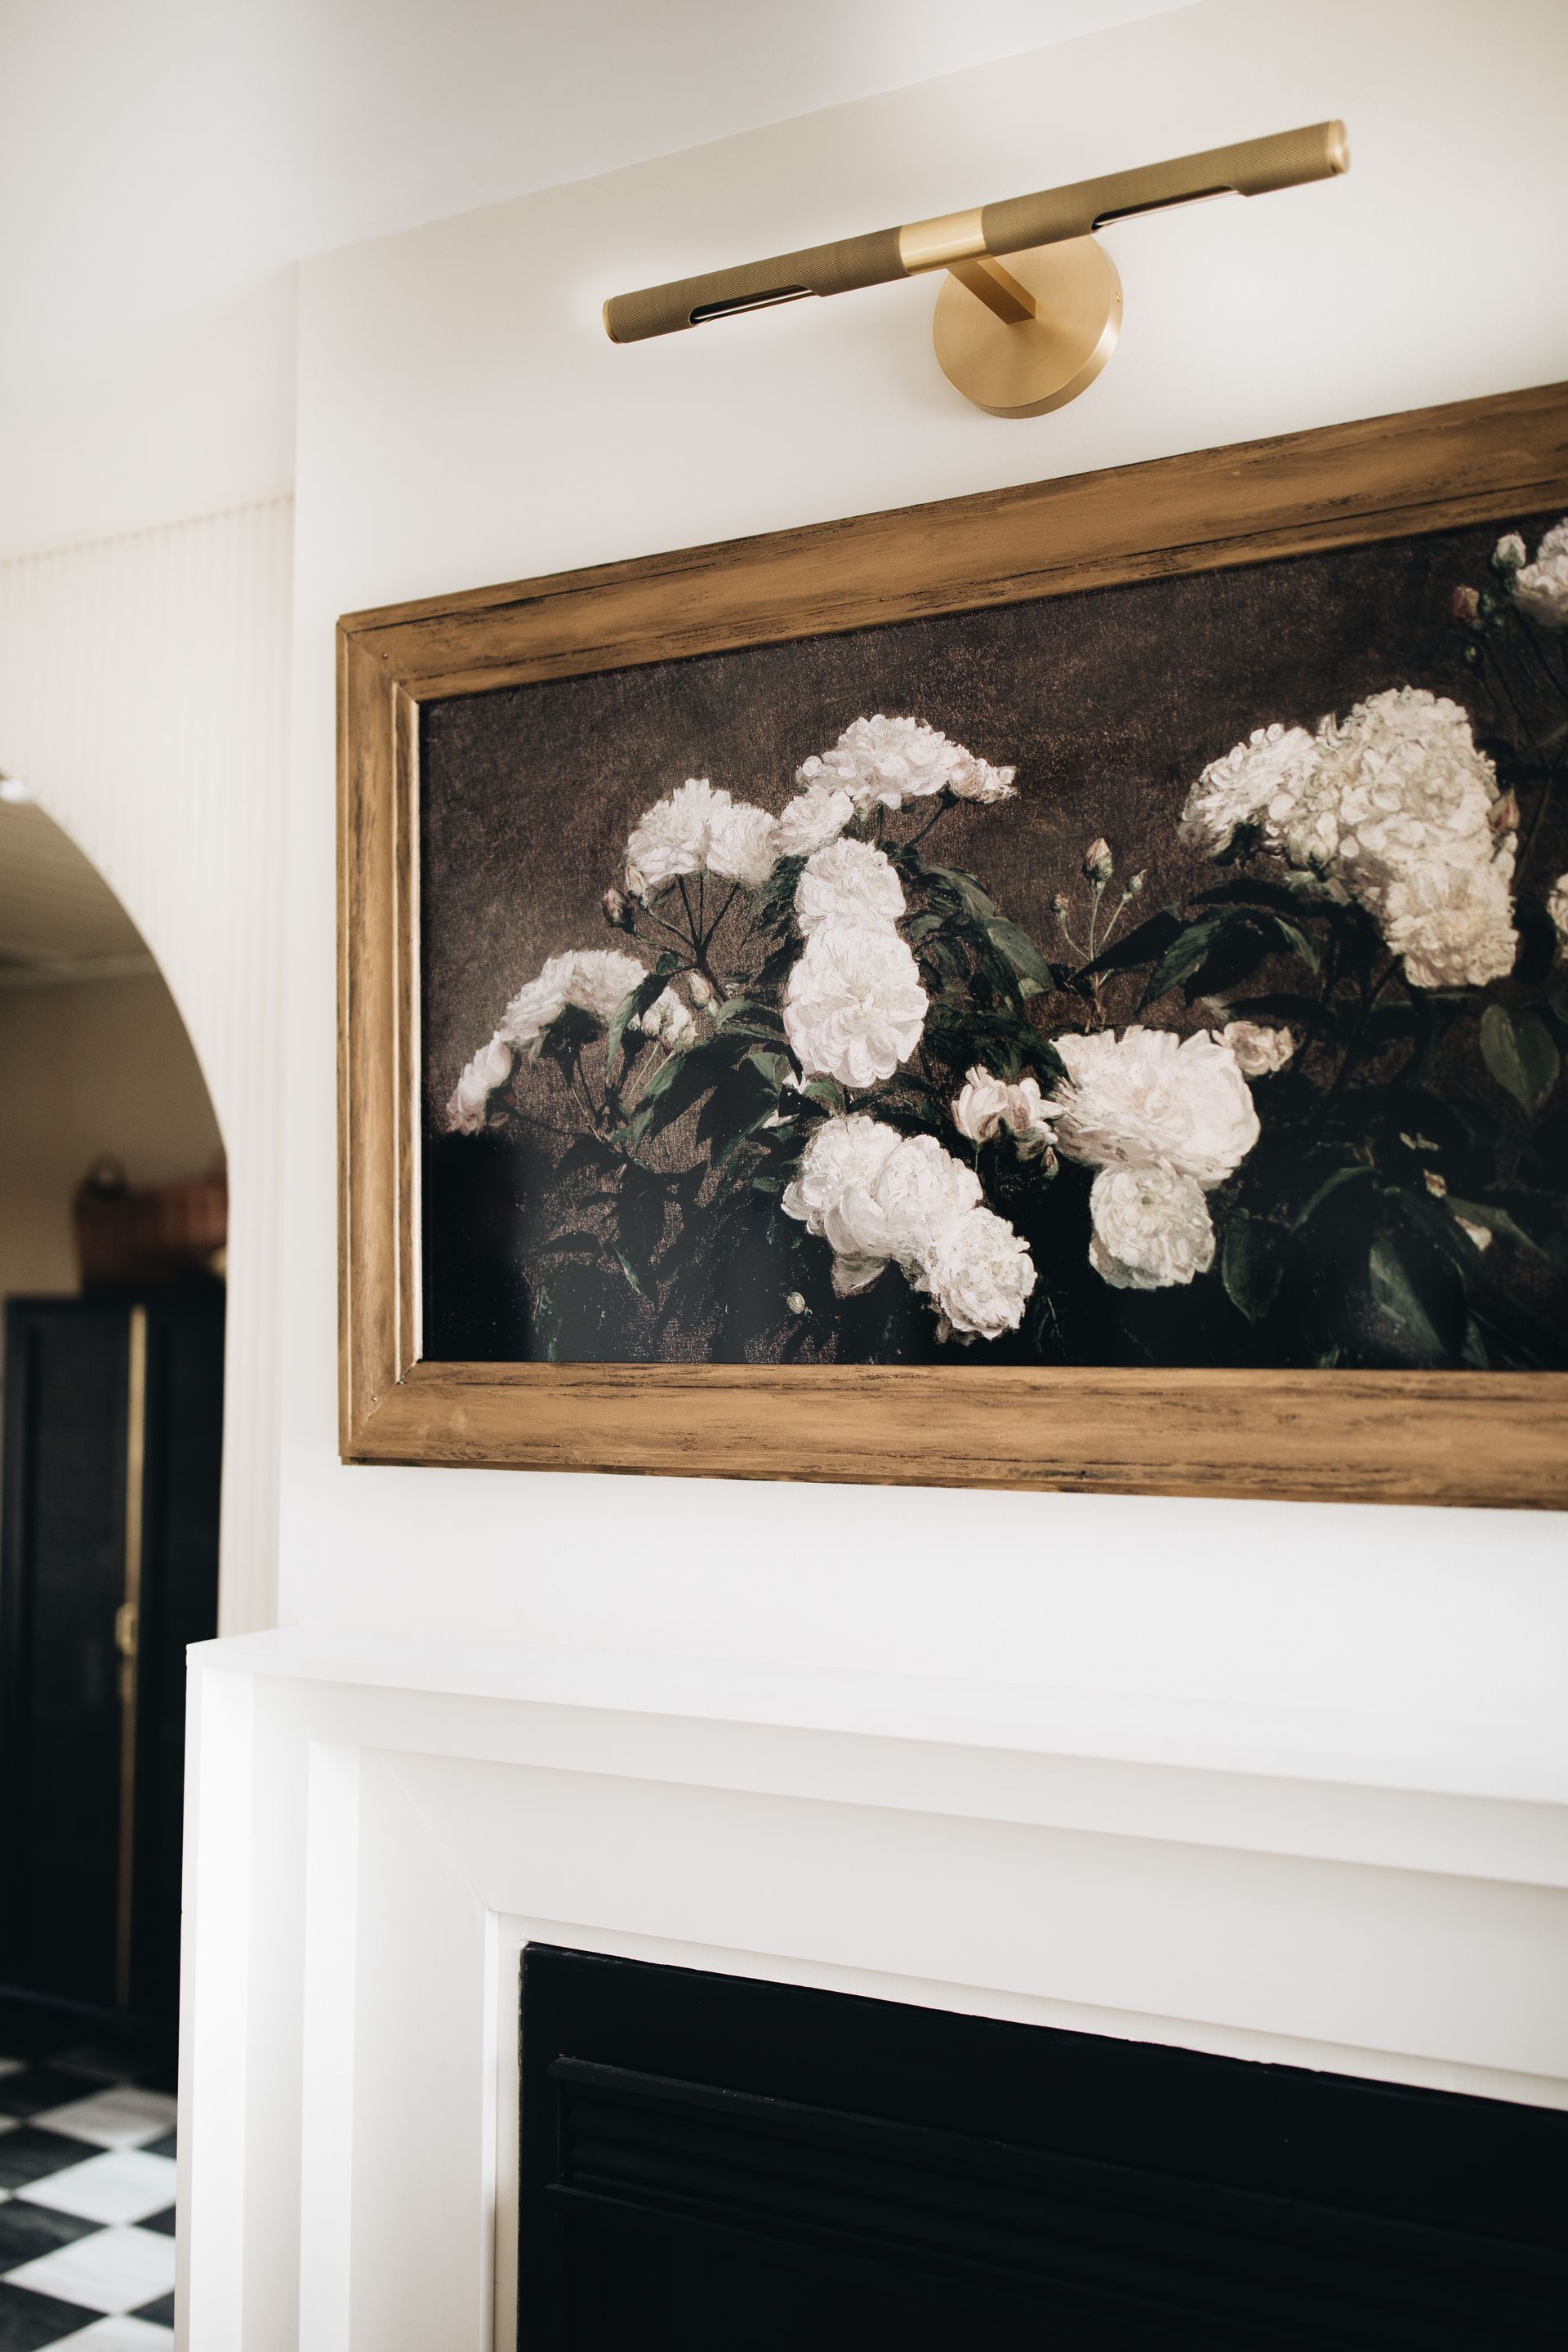
and I love how “someday” finally turned out!! It was worth the wait:)

and since the fireplace is literally in the center of our house, it’s so fun to have it be a focal point now. One that I am proud of:)

and everything pops on it!

I love how the sides even add character..

so, here’s my motivation picture again…

and my mantle now..

and just because it’s fun to see the progression, here’s the stages of the fireplace in order…
then lights and a mantle…
and finally planking and finishing…
Finished project complete! Check check.
So, here’s the breakdown.
Mantle $165
Lights $75
Plywood Planking $30
Crown Molding $20
Paint $30
Total…..$320
The other good thing about doing a project in stages is that we didn’t have to come up with all of the money at one time. It got spread out. So the final stage of this makeover only cost us $80, not too bad.