A FUN MAKEOVER
The last couple of months I have been helping a friend of mine with a renovation they did. The project actually started this summer when she told me they were transforming their screened in porch into a four seasons porch. (They have an amazing spot on the lake by the way:)
She asked if I would help her with some ideas and decorating, and since I like decorating (a little) and liked her (a lot) I said sure:)
I’m just going to tell you all right now that I am not starting up a design business. I love to help friends but I’m not looking into it as a business venture. Although I love decorating, I’ve realized I am not a professional:) I don’t have my swatches and resources and degrees or anything else….and at this point in my life I don’t have the time to pursue it full time. I have been having a blast helping out a few ladies though and am so excited to show you this project!
So, here’s what her porch looked like “before”…
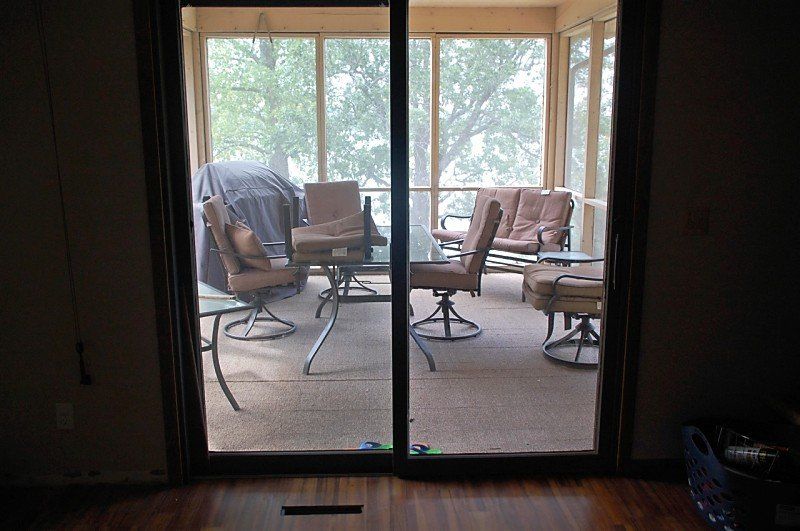
It’s attached to a small living room with fireplace, so the extra space was going to open it up big time and allow for nice family living space. They had a family member do all of the construction, and they already had decided that they were going to open up that wall a bit wider and add some columns to separate between to the two areas.
When she first told me they were going to do a four seasons porch I immediately thought light colors. All of their trim in their house is wood, but you know me and my love for painted trim…..:) So I talked her into doing a cream trim with wood details in the ceiling and pillars to pull it together.
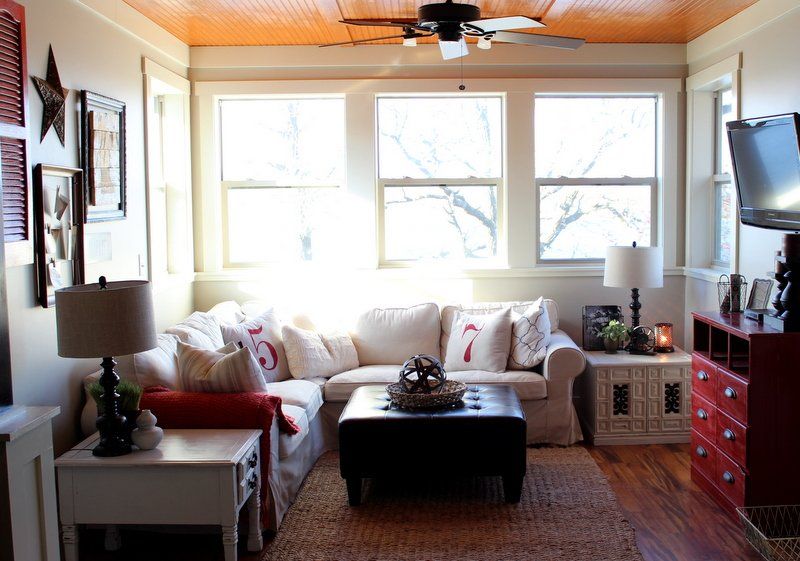
I wasn’t too good at snatching pics in the process, but here’s what we came up with when the addition was done.
Their kitchen is right off of the area as well, and they have two tone cabinets that I love. (I should’ve snapped a pic) but their bottoms are a dark stain and the uppers are lighter, so we brought in both colors in this room. I knew they were a little “hesitant” about all of the cream so I suggested a wood ceiling to warm it up a bit. They used the stain of the uppers for the ceiling. *she was a little bummed the stain stained a bit more orangey than her cabinets but I still think it looks great:)
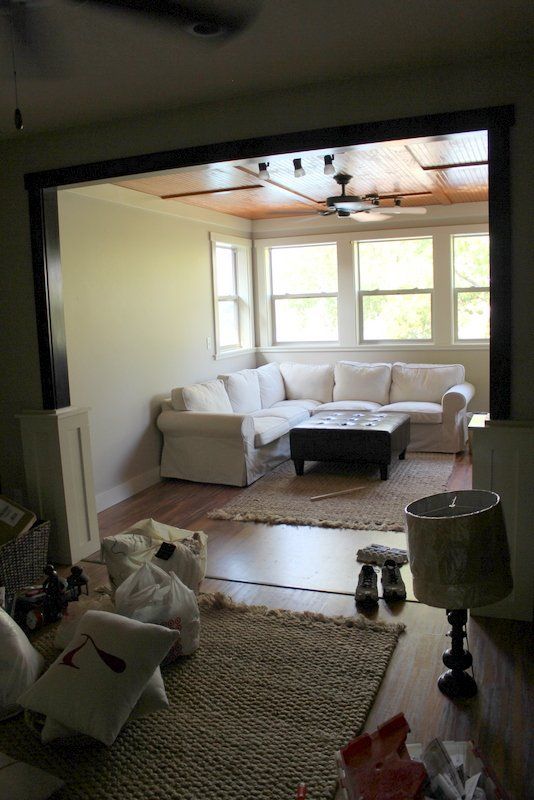
Here’s the living room that is attached to it.
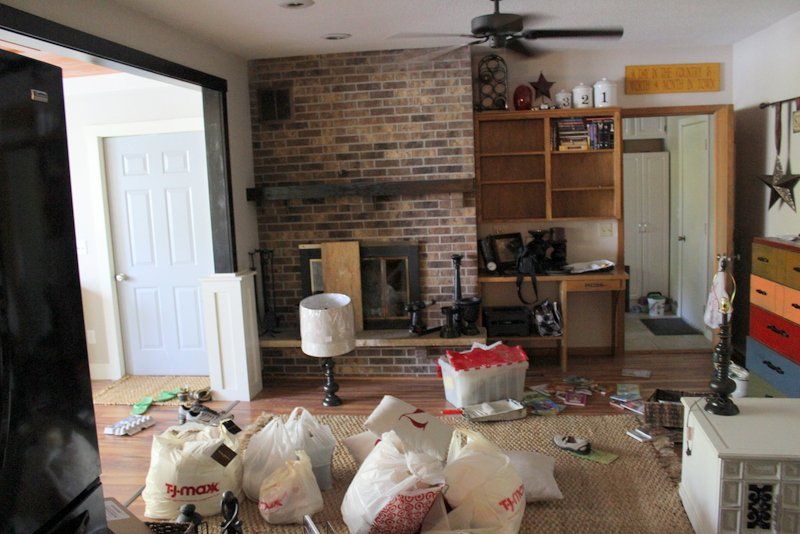
It’s a step down from the kitchen (where I’m standing) and super cozy. I’m guessing you can bet what I wanted to get my hands on in this picture??? And yes..we did. We painted the brick! Surprise:)
This was the blurry cell phone pic,
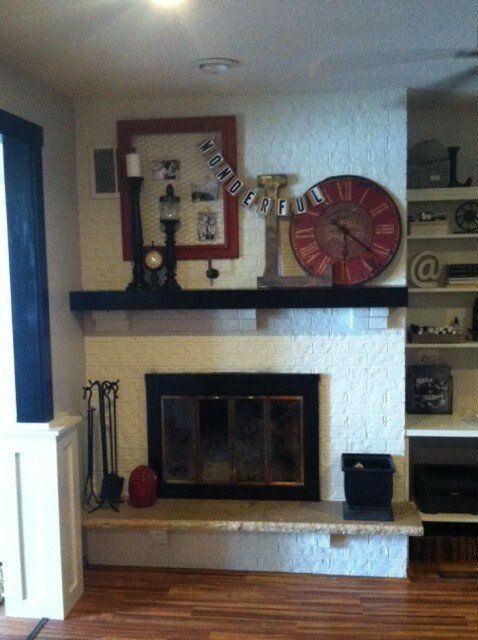
and this is when she had the fire going and everything clean for me to come take pictures:)
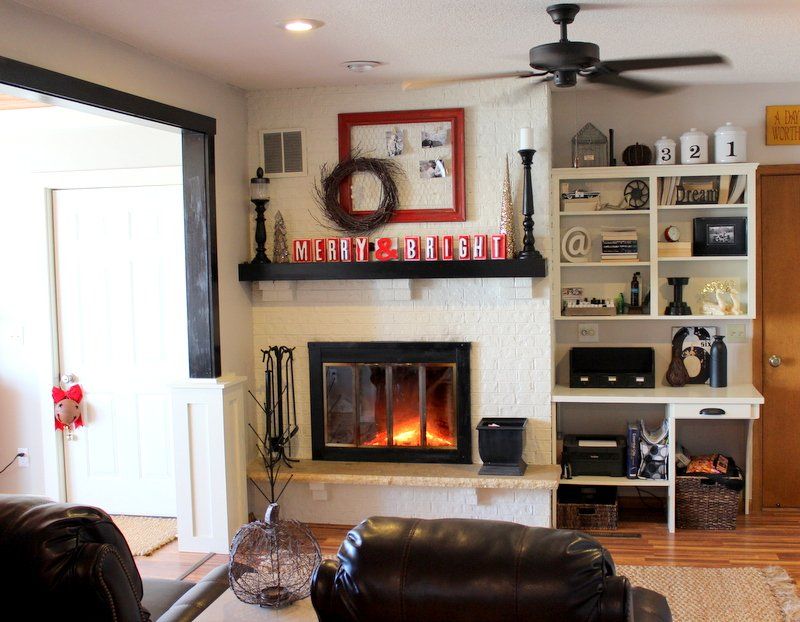
We painted the built in too, and I can’t tell you how much it updated it.
I actually can’t take too much credit for the manual labor in this place. And I have to tell you, it was so much fun to say I would paint this this color, and I’d come and it.was.done. AMAZING. That never happens with a DIY’er:) All you fellow DIYers get me.
It was also AMAZING to be given money and just told to “shop for the room.” Seriously. That’s what I got to do. And that’s what all of those bags are up there.
So, we started with the basics in the room..
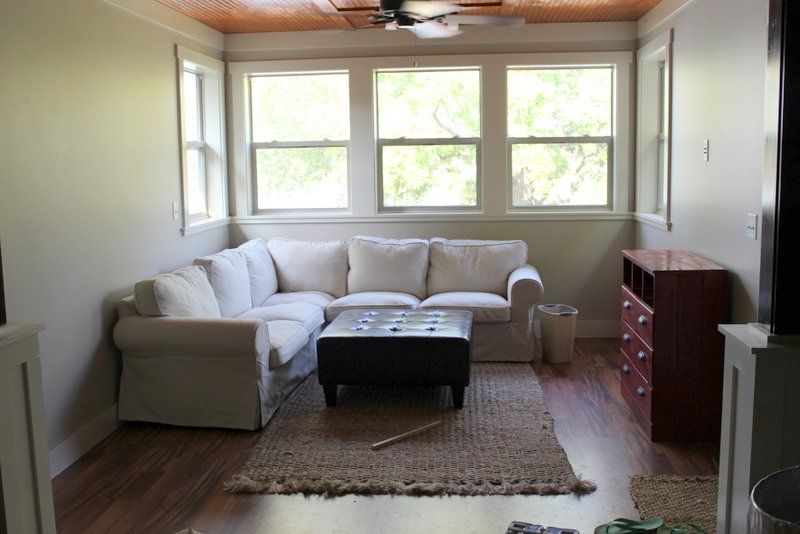
The rug is from Ballard, the couch is the ektorp sectional from Ikea with the wheat/linen-y looking slipcover (no white this time:)
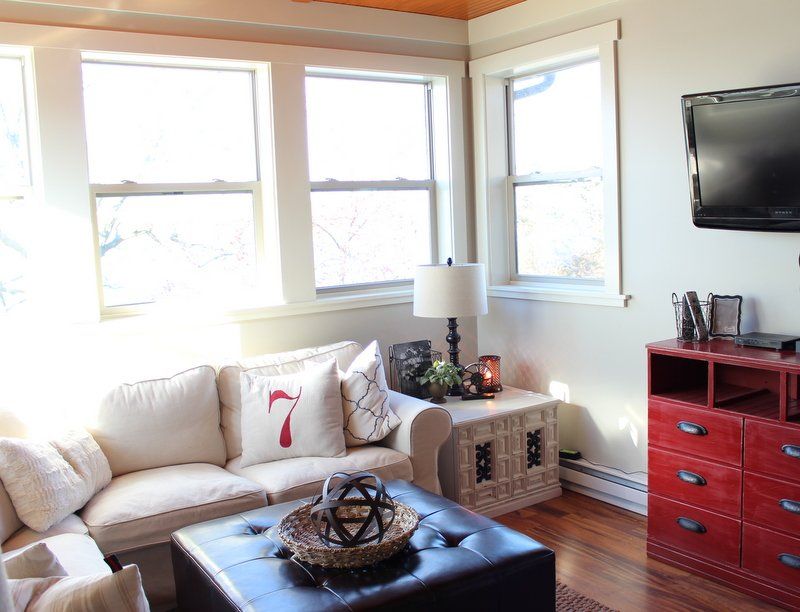
The ottoman is from overstock and the red tv stand she had and I gave it a bit of a paint job face lift. Oh, and the wall color we used was Revere Pewter, by Benjamin Moore and the trim was cotton blossom by Dutch Boy.
After the basics were done, I got to make it cozy and decorate…
now wasn’t that just fun.
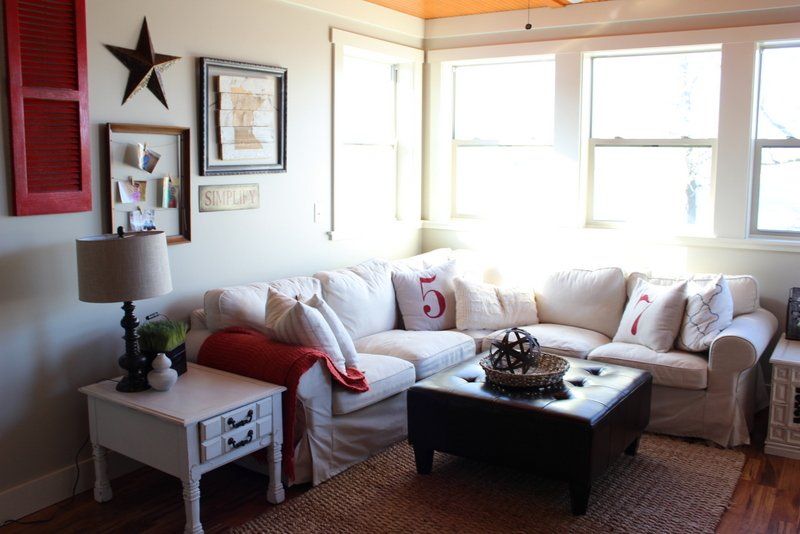
The end tables came from my shed with a face lift:) The lamps were from Home Goods, and were most of the pillows and accessories.
I made the number pillows for her, cause what’s a makeover without a few numbers right?!?
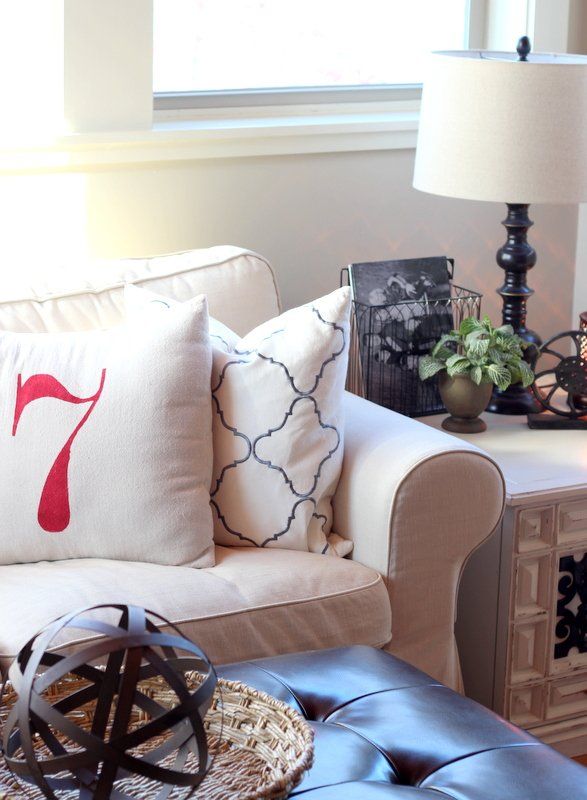
I fell in love with the blue moroccan pillows and quite honestly didn’t know what colors I was going to accent with until I saw them. I guess you’d say they spoke to me:)

and every good sectional needs a faux fur pillow. Pretty sure her hubs thanked me for that one;)
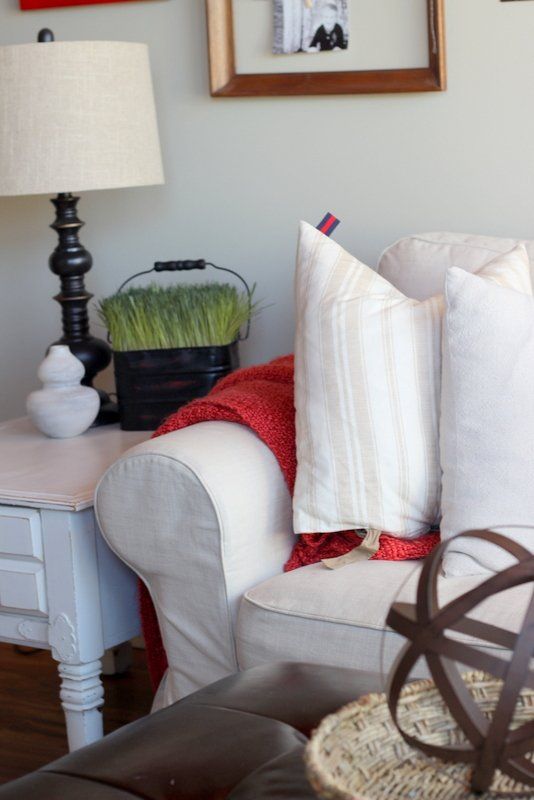
It”s all about the texture. That’s why I grabbed this throw as well, to warm it up a bit and bring in the punch of color.
And I had loved that she had so many great Whimsy buys:) So we had to find a spot for them. We put together a little “gallery wall” behind the couch.
She’s still planning on hanging some bamboo shades in the windows, but other than that we got her mostly wrapped up!
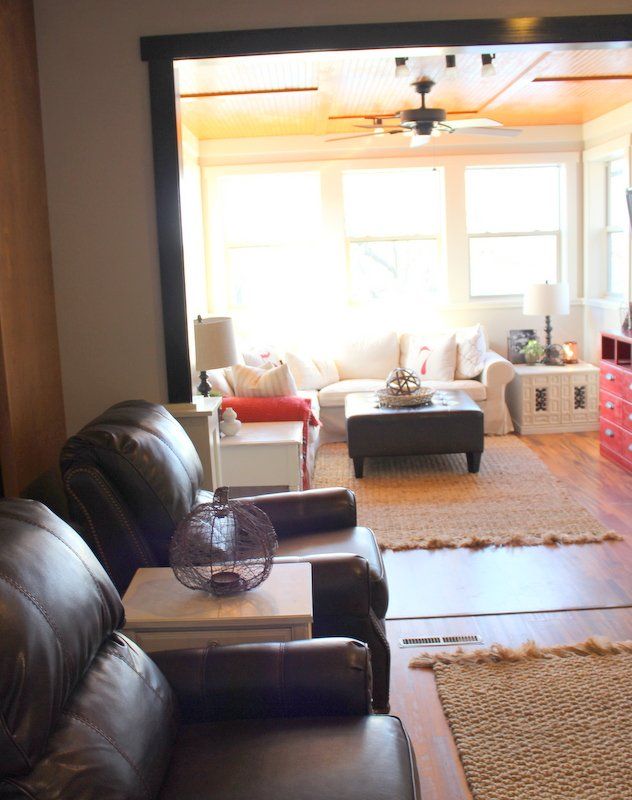
They just purchased these amazingly comfortable leather recliners for in front of the fire….seriously cozy spot. And now they have a double functioning living room. Gotta love that!
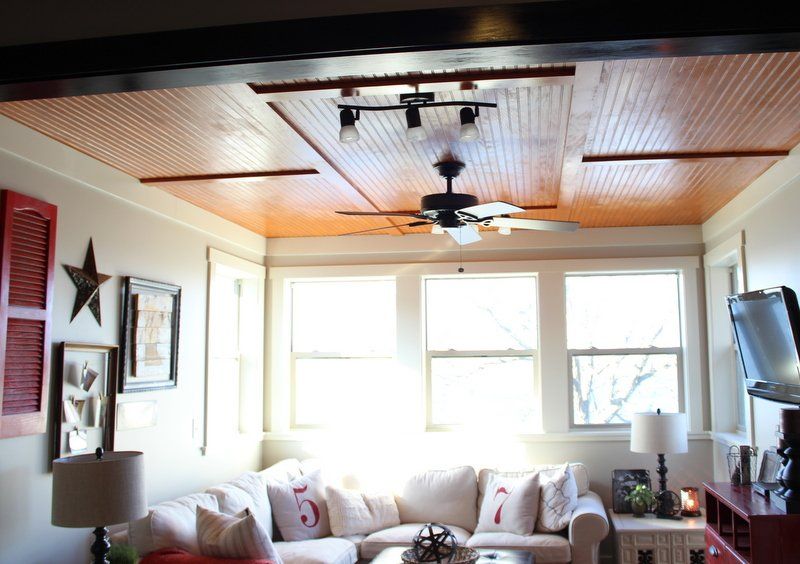
One last shot with a better look at the ceiling.
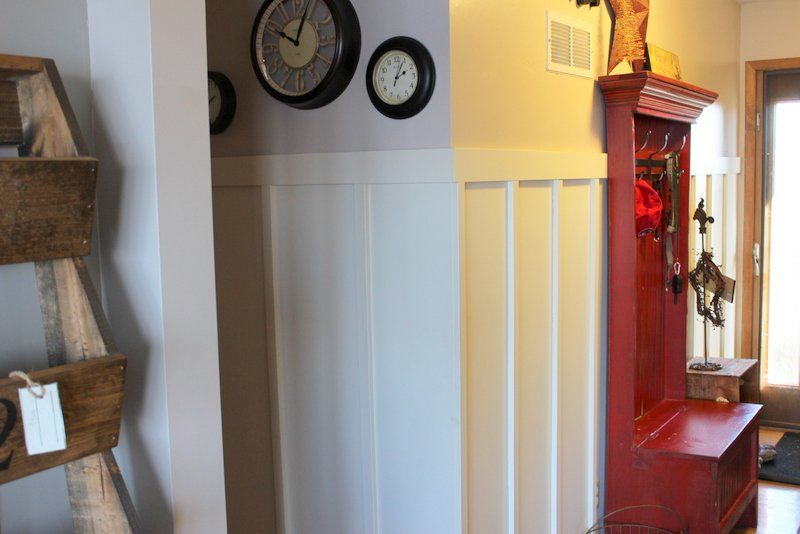
The last thing we did was add a little board and batten to their entryway. I loved how this area turned out, and thought it would help the flow of the house better if we brought some of the cream to the front of the house, and tie it in with their wood trim there as well.
Board and batten was the perfect fix.
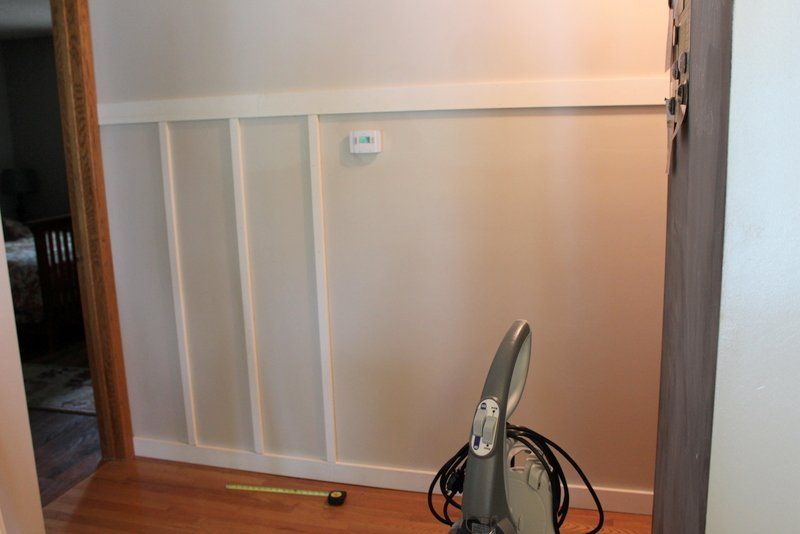
We did it down their hallway and to their front entry.
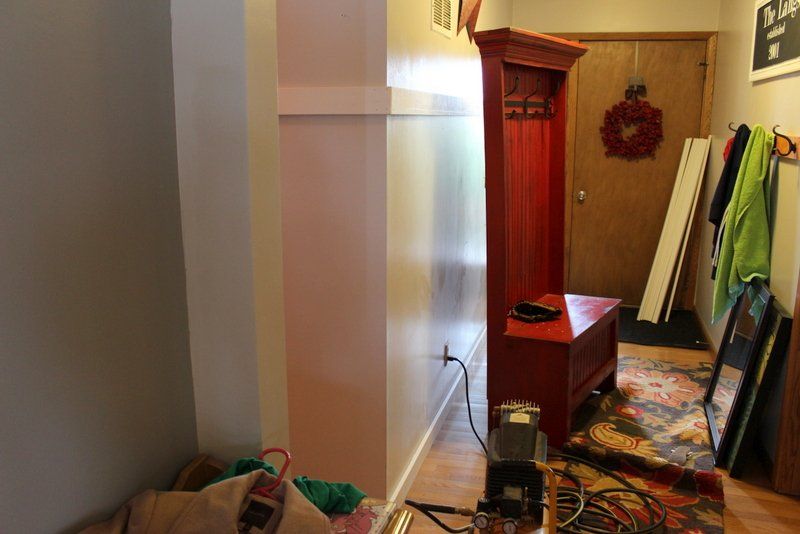
I put the boards up for her (after her hubby cut them the right lengths, boy did that go fast!) and again, I got to just come back and see the results after she had painted!
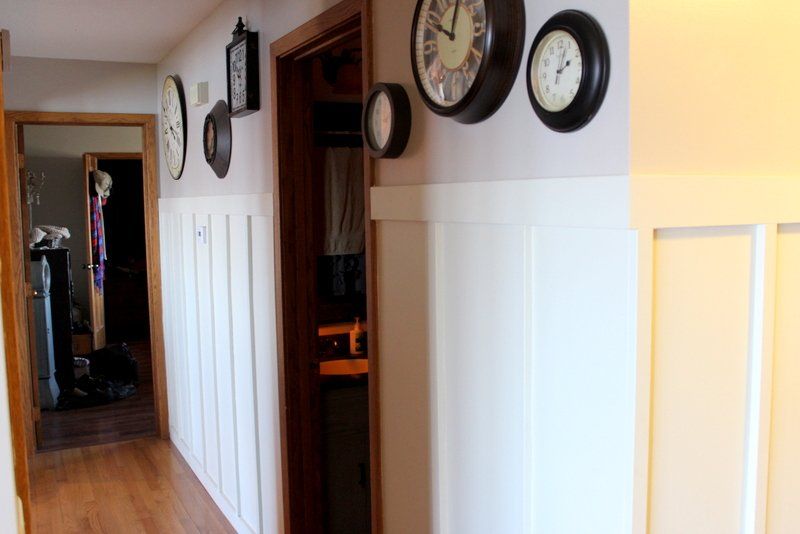
I love how it turned out…and her clock collection!
So there you have it. Thanks Dan and Abbey for being amazing friends/clients to work with:):) I had a blast doing this project!