RUBY’S ROOM REDO
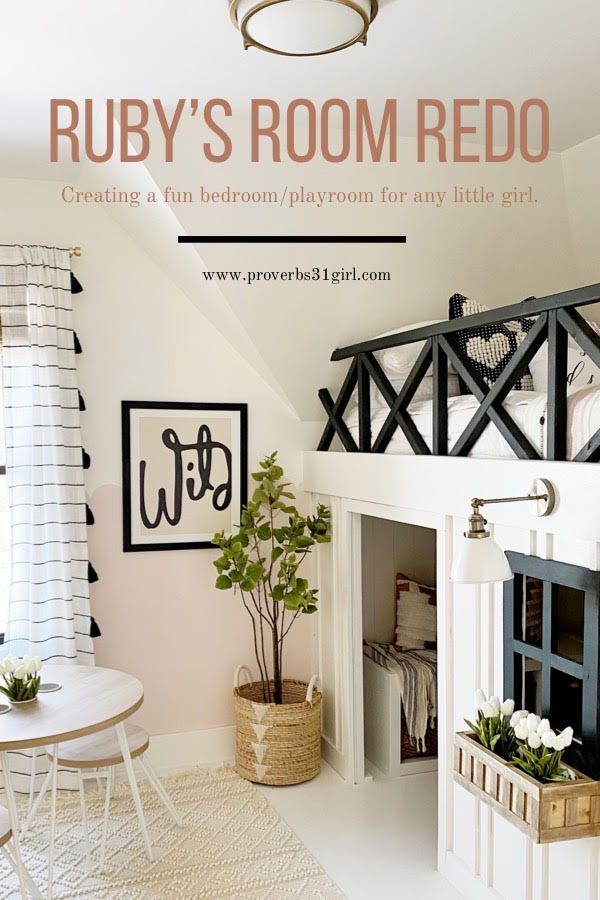
Rubys room was super small to start with. There was no closet, and between a crib and a dresser, the room seemed crowded. Add to the equation 97 dolls with 4 strollers and 82 stuffed animals, and it looked like a toy shop gone wild:) I knew this room needed an update since Ruby is no longer in a crib, and I wanted to make it not only functional, but also utilize it as a playroom as well! But first lets look back at the before..

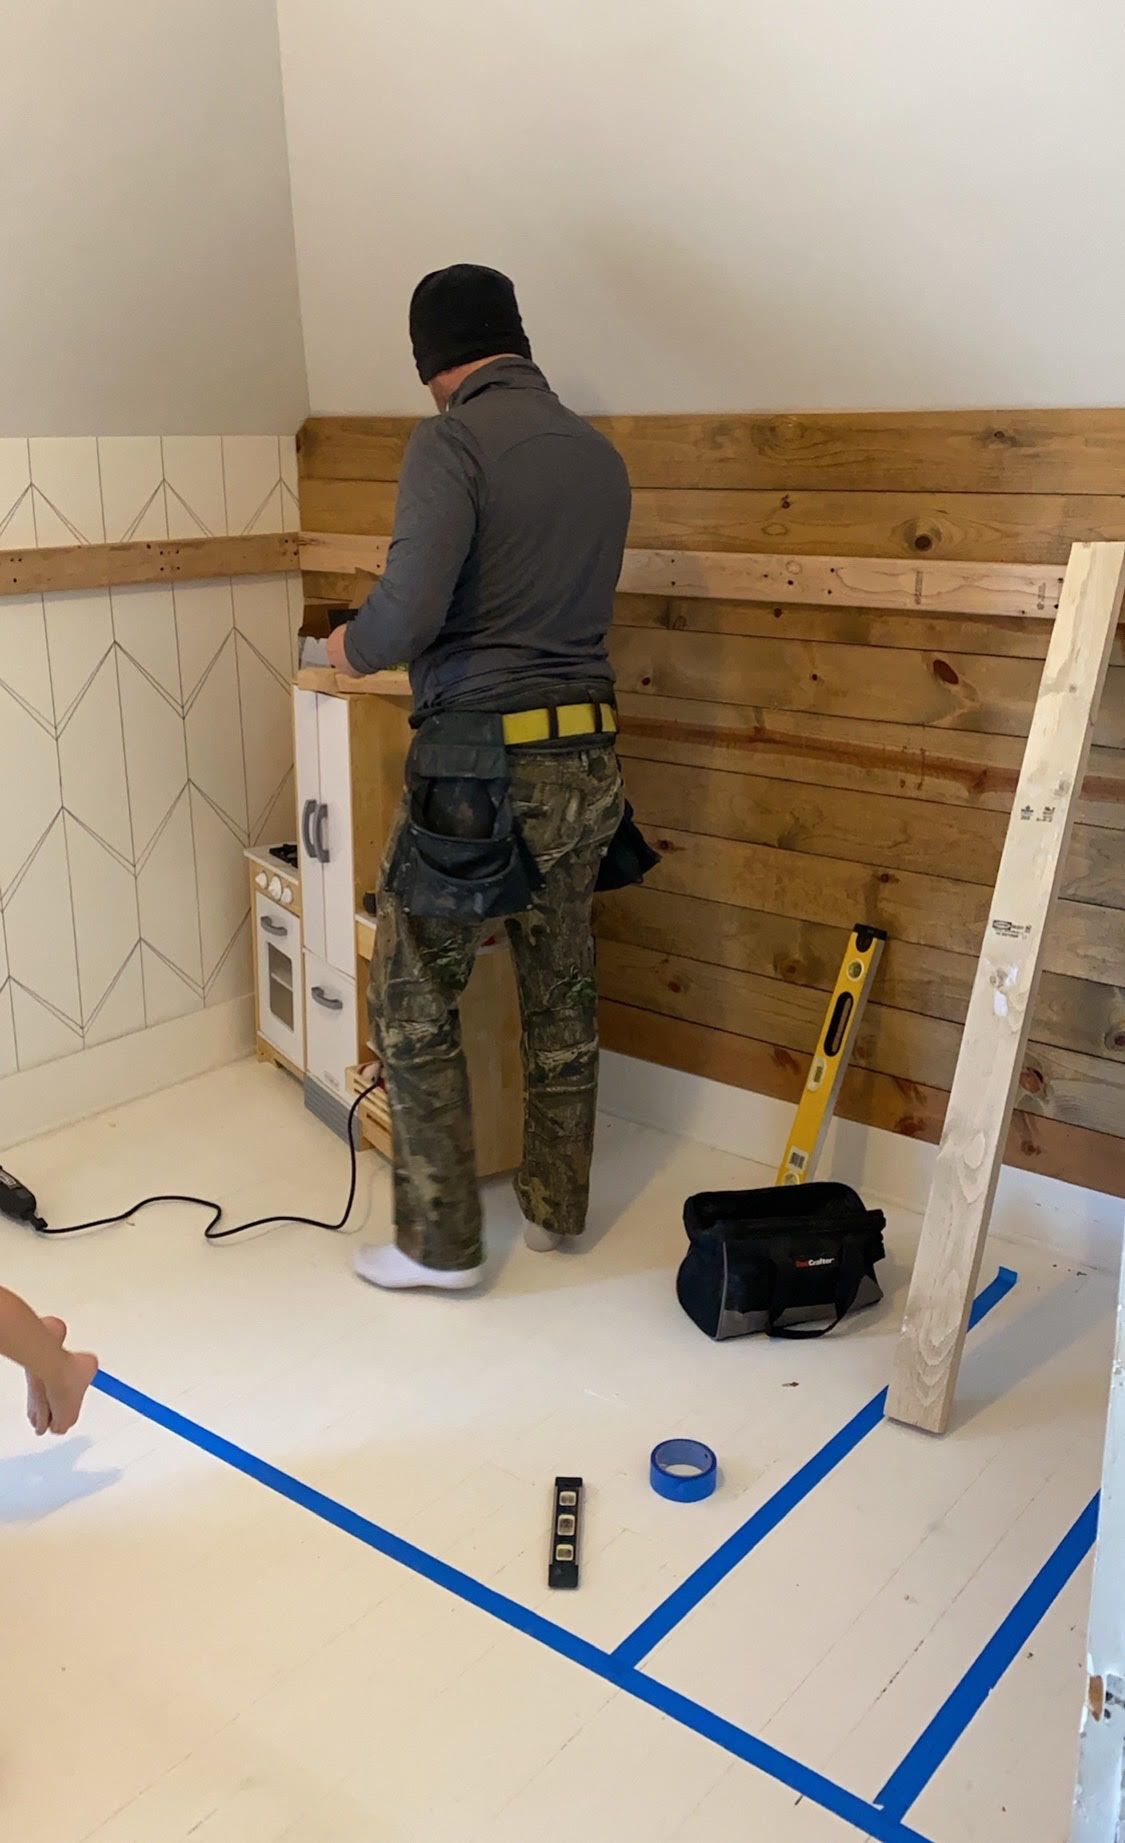
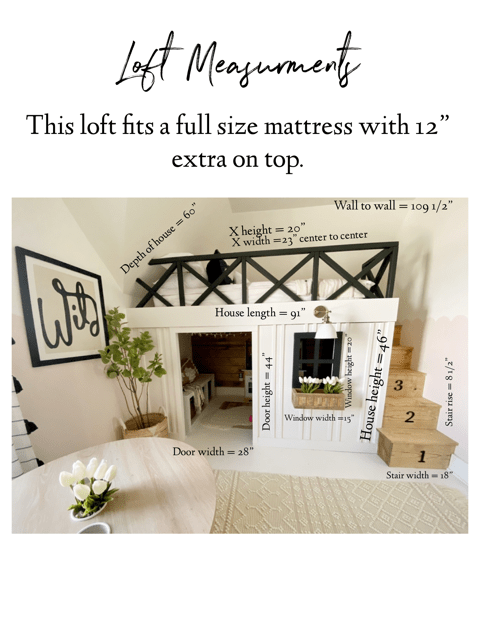
So far this room has been 3 out of 4 of my kids…it’s like the evolving room, lol! Only Beckett hasn’t called it home:) I added the wood wall and the sharpie wall art (no that’s not wallpaper and you can find the tutorial here) when Kynlee was in here. And I was too lazy to find any different wall art that I kept the K on the wall, sorry Kuby :) This room is tricky not only because it doesn’t have a closet, but also because of all the slanted ceilings. I decided to make the slant work with me and build the loft bed under them! I am going to attempt to show you how we made this loft, but I have to admit, with projects like this we kind of make it up as we go. We did know we wanted this bed to be a full size, so we came out 58″ from the wall. I did not take into account that I was going to add the 2″ x railing and so if I were to do it again I would come out 60″ from the wall if you want to accommodate a full size bed:)
I will try to draw a picture with all of the measurements in one spot at the end as well! But we screwed 2×4’s into the studs on two sides and the bottom of the 2×4 hit at 46″ so the kids had enough room to stand up in the house.
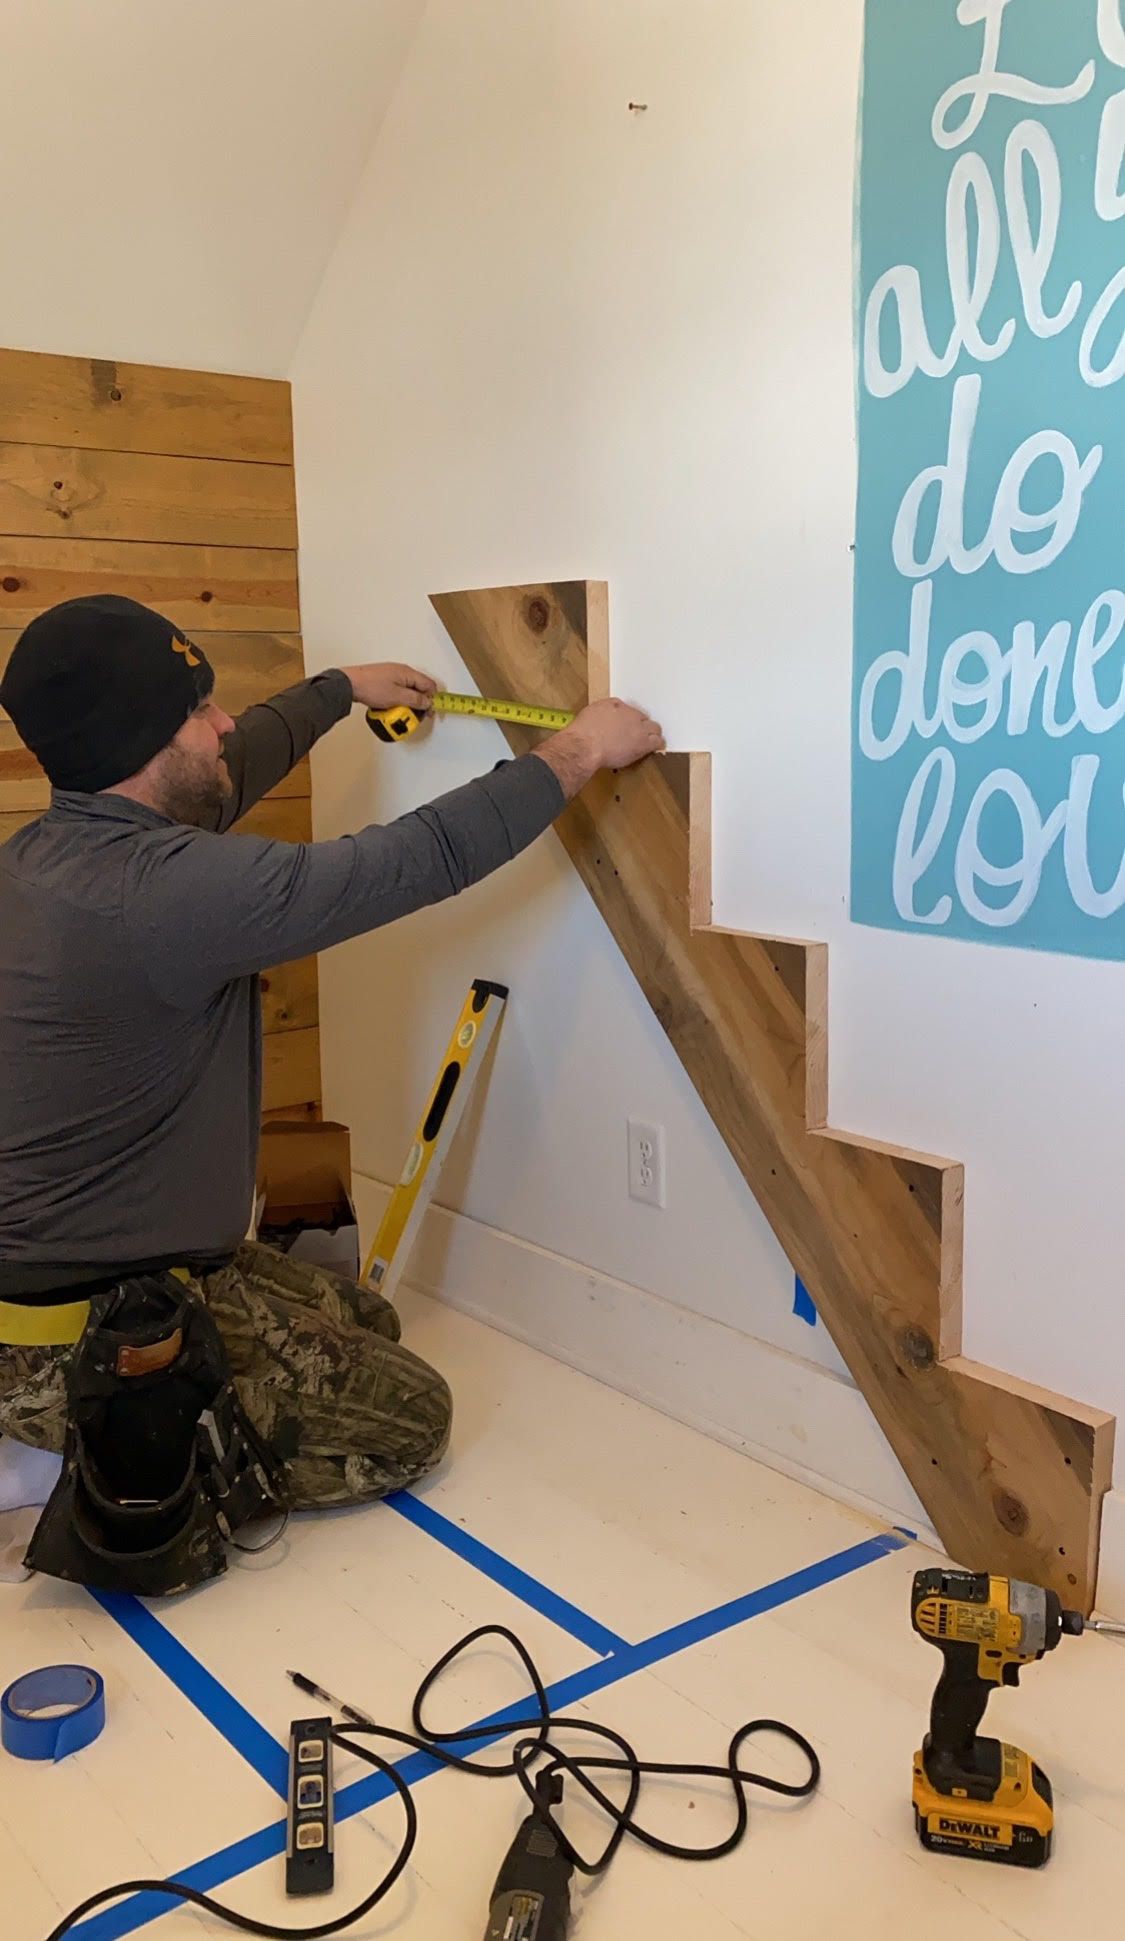
Ryan also made custom stairs since this project is a bit unique! We made 4 stairs and a landing and the stairs are 18″ wide and 8 1/2″ steep. That’s just what worked best for us! Ryan screwed the stair brackets into studs on the outer wall and then we built the loft before we attached the other side of the stairs to the loft and added treads. We used pine and plywood for this whole project which kept the cost super effective!
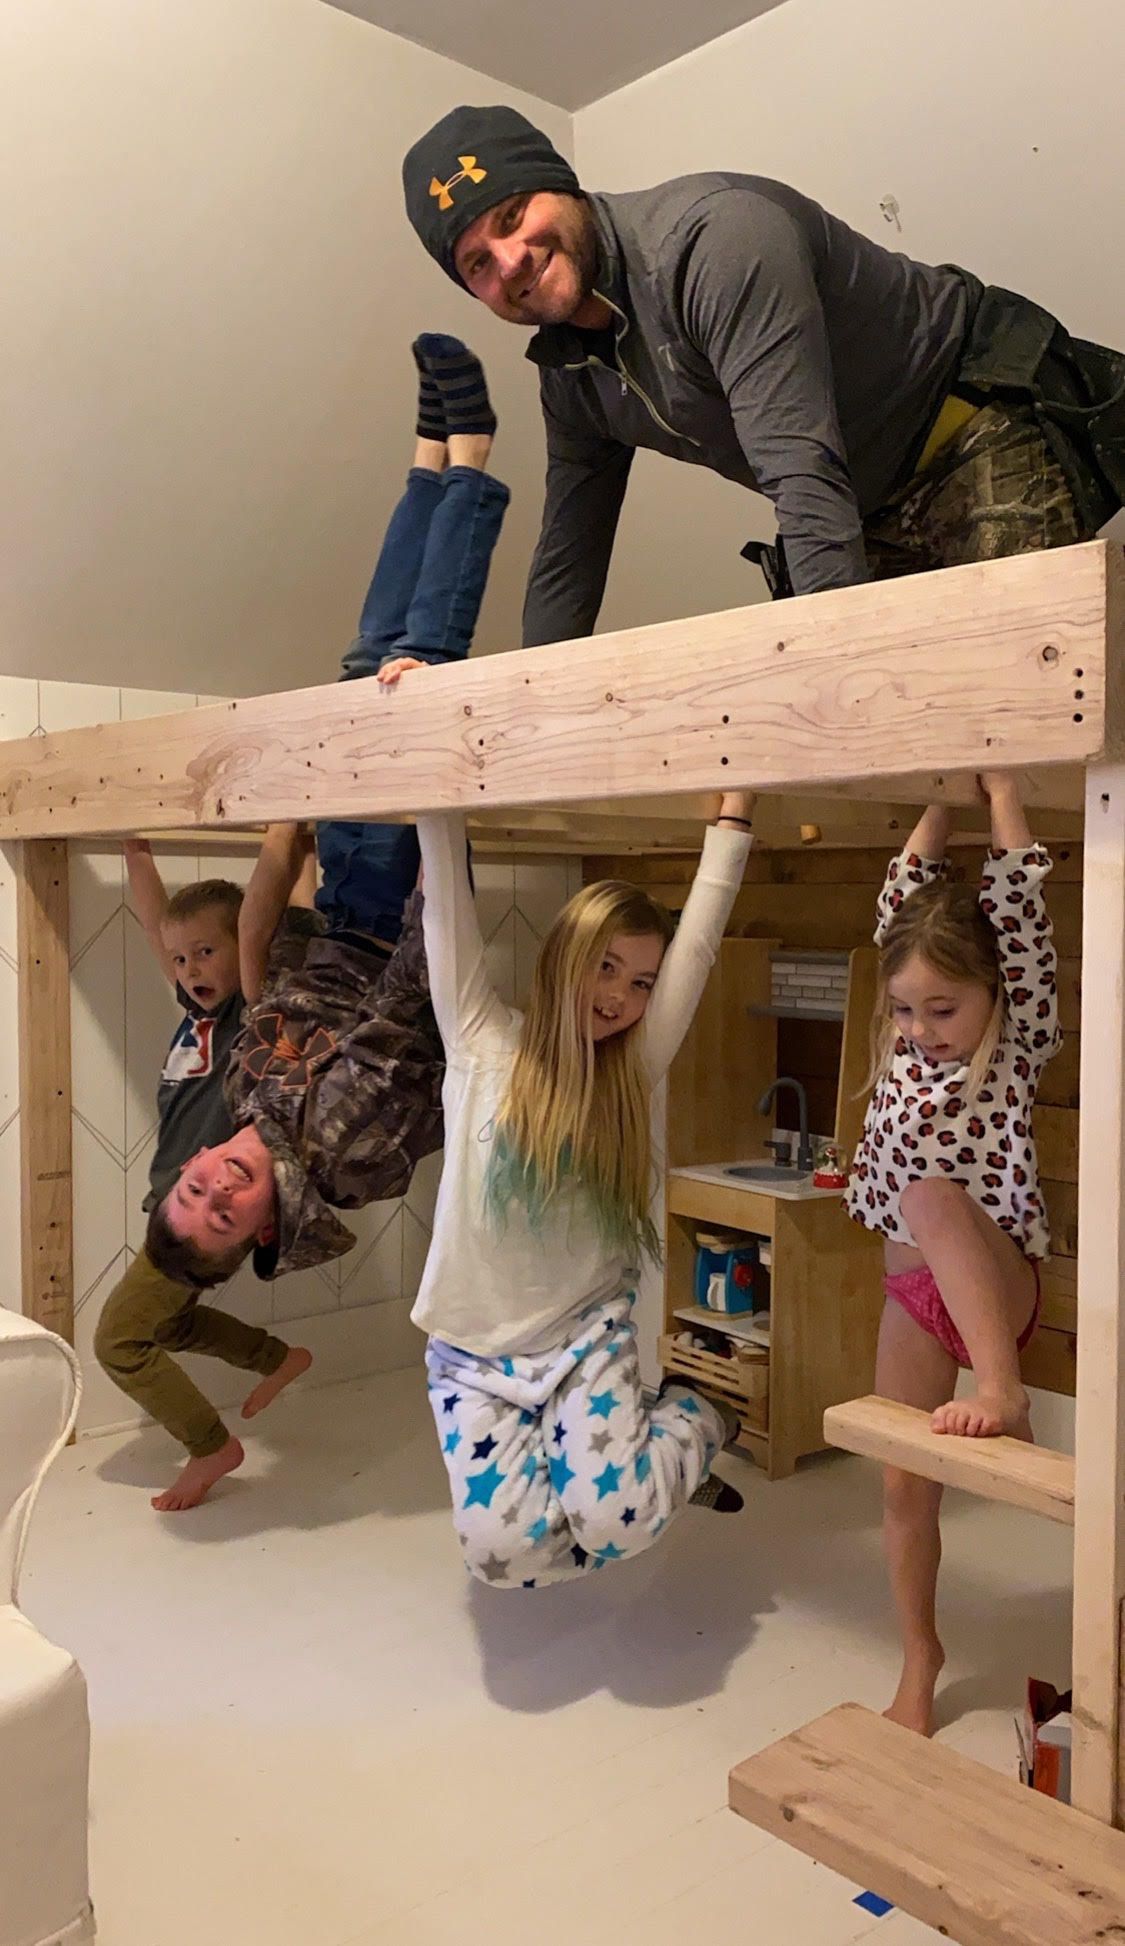
I obviously didn’t do a great job documenting the build as I was helping Ryan and he works fast:) But he added two vertical 2×4’s for the side boards to sit on, and then a 2×8 on the front. He then used 2×4’s every 16″ I believe as stringers and screwed them in and put 3/4″ plywood on top. We wanted to test it out to make sure it would hold enough weight, and obviously Ryan was very confident in his work since hes sitting on top:) Now onto the pretty pictures. First I will show the before and then you can see how adding this play house actually seemed to make the room seem larger!
After…
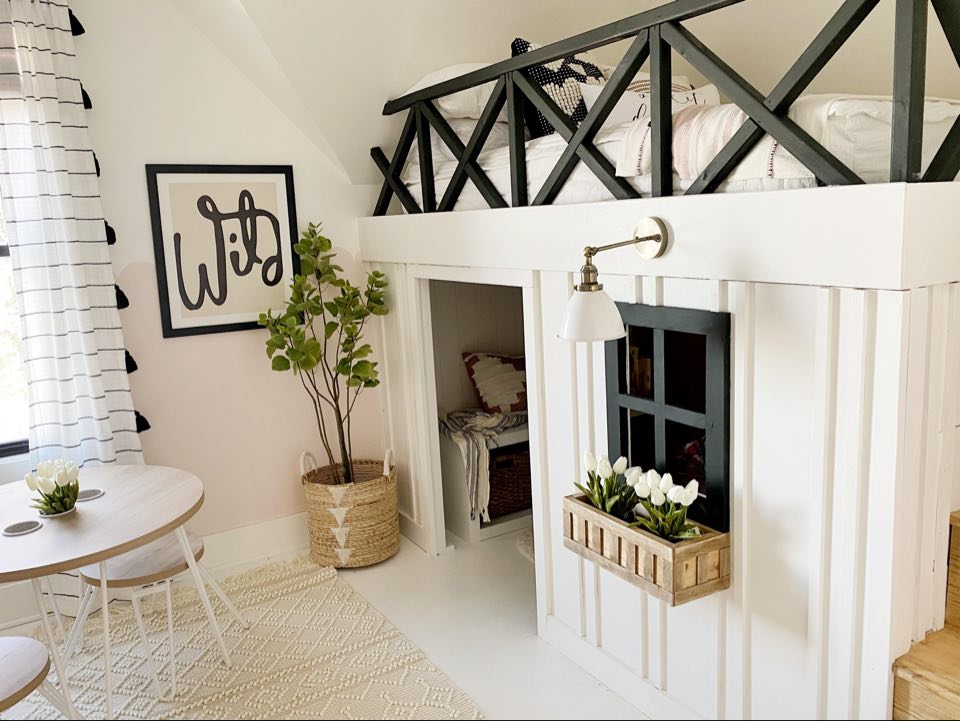
Now lets talk details on the house. I used 1/2″ plywood ripped down to 1″ strips for the double board and batten. I also cut a doorway in 28″x44″ for the kids to enter. I kept a door off just because space is tight, as well as light is important. I then cut a window into the plywood that measures 15″x20″ and trimmed it out with 2″ pine boards that I painted in Kilz Brand Toasted Poppyseed paint in flat.
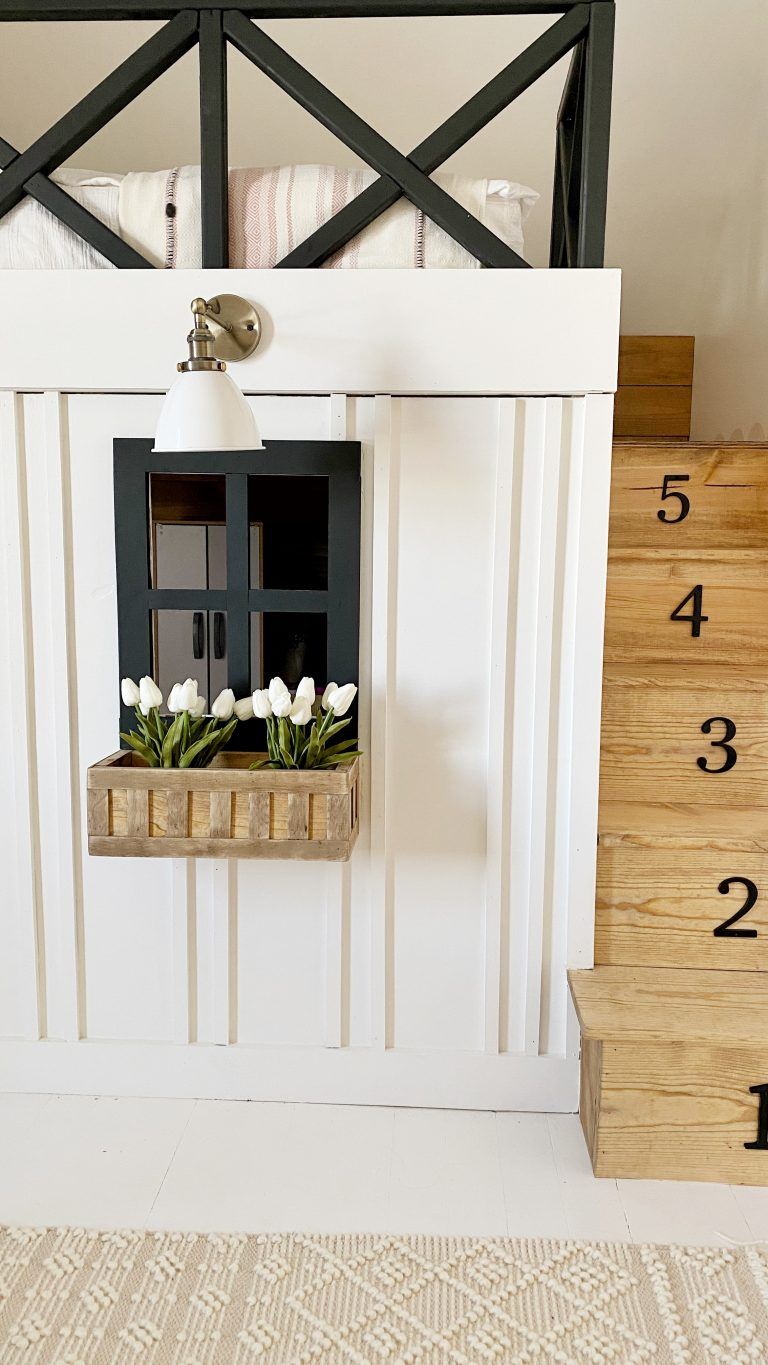
I added this little window box that I made out of pine and lath boards. I have a tutorial on my instagram page that you can find here to make one of your own! I was also so super excited to find these faux tulips that look so realistic! No watering for me:) I added this sweet little sconce over the window and used a puck light to turn it into a magic light hack that you can find here.
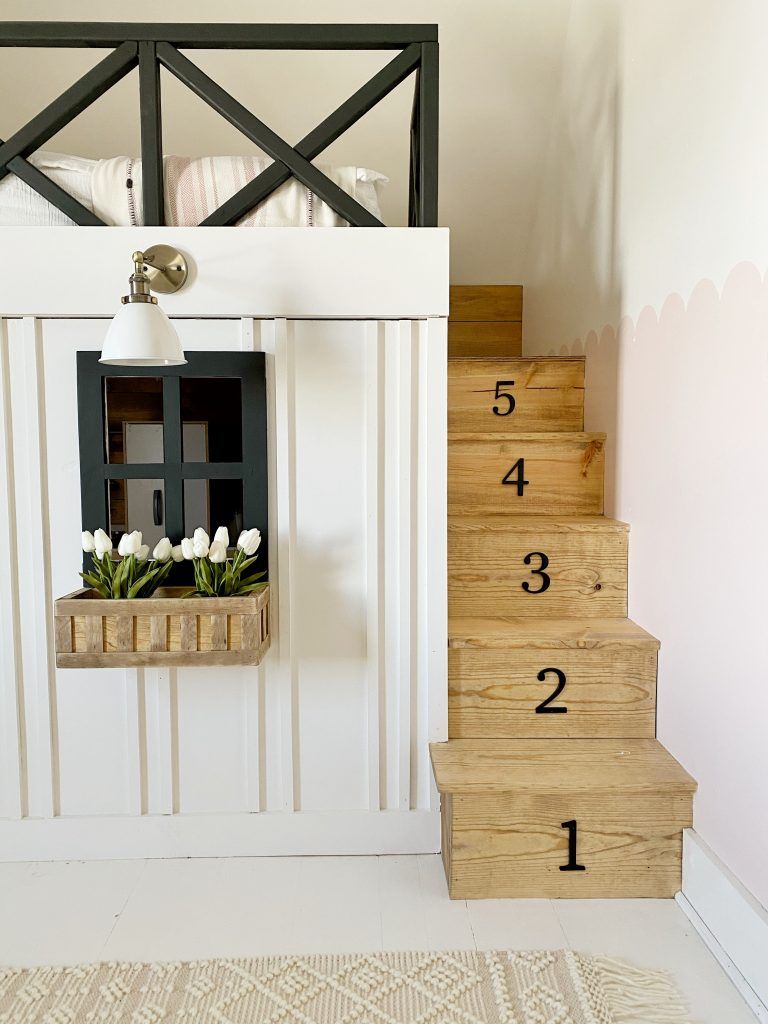
I added these house numbers to the stairs to bring in a pop of black and make it more playful for the kids, and also added the perfect shade of pink called Taupe Pearls by Glidden in satin and created a scallop edge detail in the room. You can see how I did that on my tutorial I made in this highlight.
On the other side of the room we saved so much space by taking out the dresser. Since the boys down the hall have a large closet, I moved all of Ruby’s clothes in there and saved valuable square footage in here. Let take a look at the before and I’ll show you what I changed!

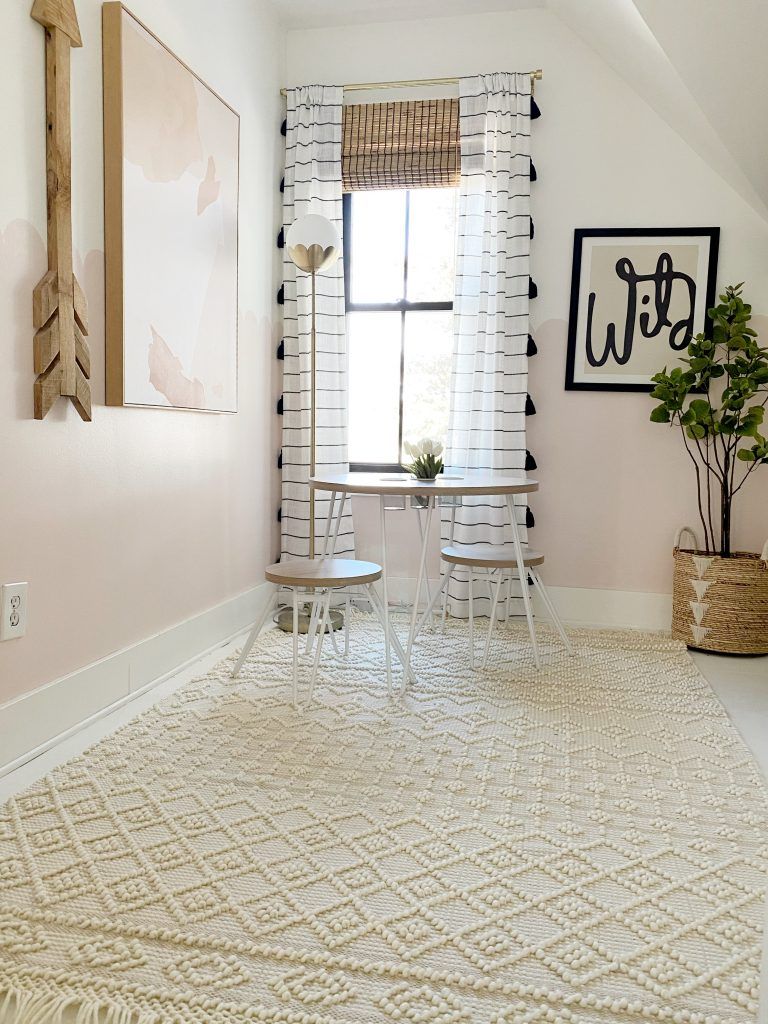
Not only did I take out he dresser, but I also took out this oversize chair, which was really too big for this little room! I also painted the window black (which you can see my full tutorial here) and added a little table and chairs area for crafting!
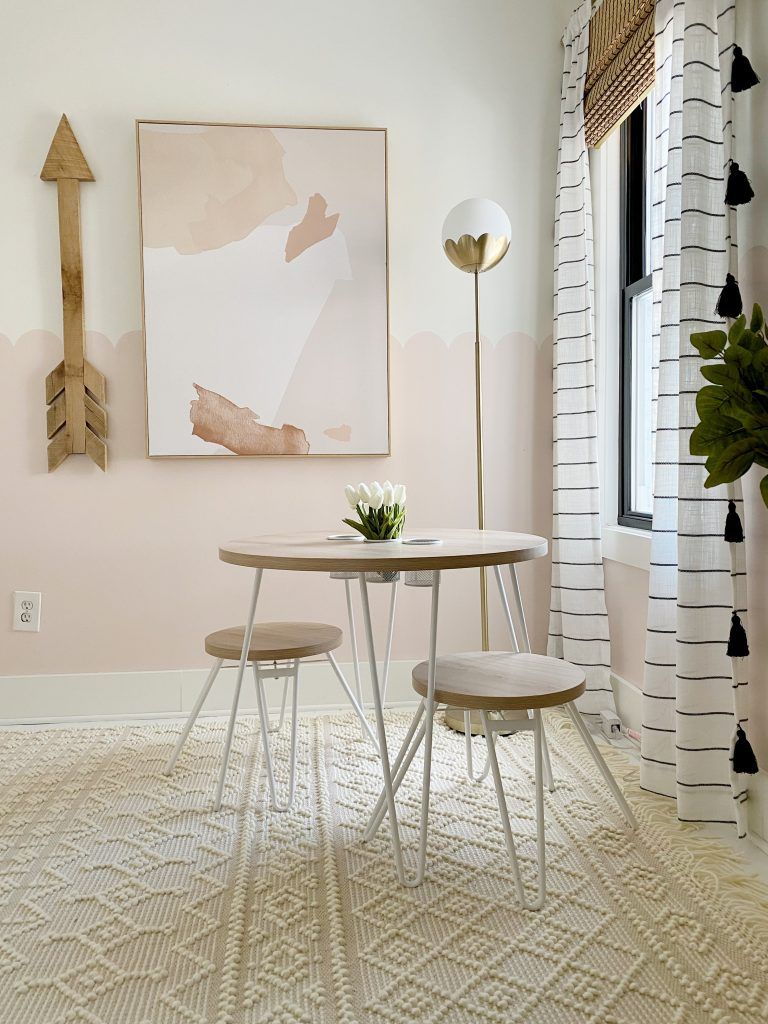
Sadly this table and chairs were discontinued, but they made a rectangular set just like it that you can find here, or otherwise this is a great circular option as well:)

I instantly fell in love with this rug from Boutique Rugs because of the pretty color and texture! Not to mention the great price! And Boutique Rugs gave me a 60% off coupon code 31GIRL60 until March 6th, otherwise you can use 31GIRL55 for 55% off after that! You can find this rug here. Ps, that coupon code works for any of their rugs!
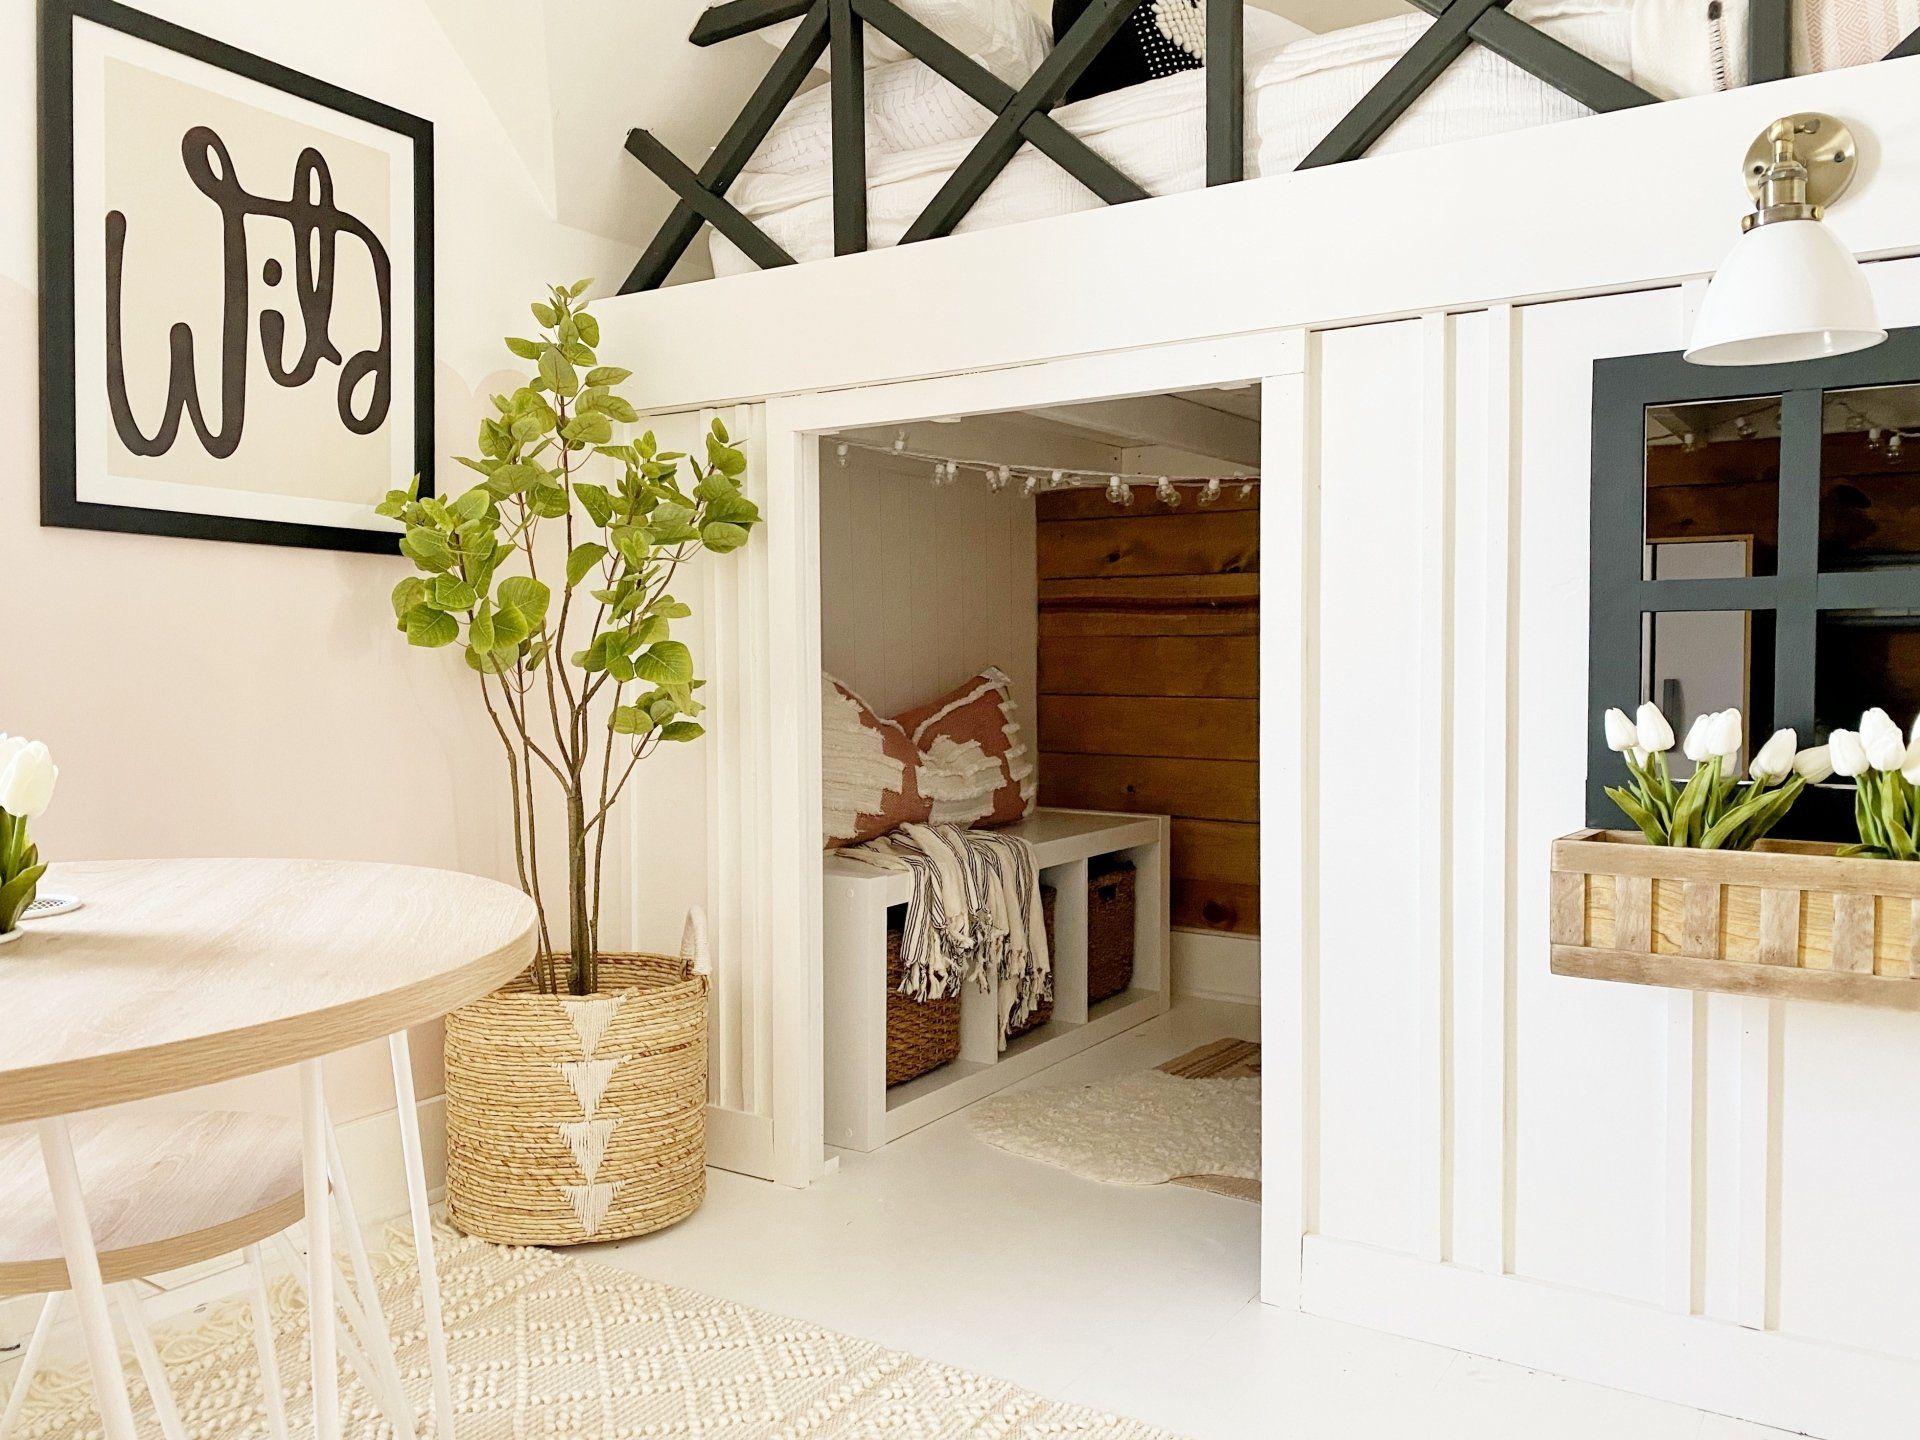
I added this fun 4′ tree to bring in a pop of green and also to dress up the front of the house:) I found the basket at home goods and couldn’t find a link for that. I also added this 3 cube shelf with these baskets to hide all of Rubys Barbies in! I love that it doubles as a bench and am still hoping to make a cushion for the top of it:) Now onto the actual bed…
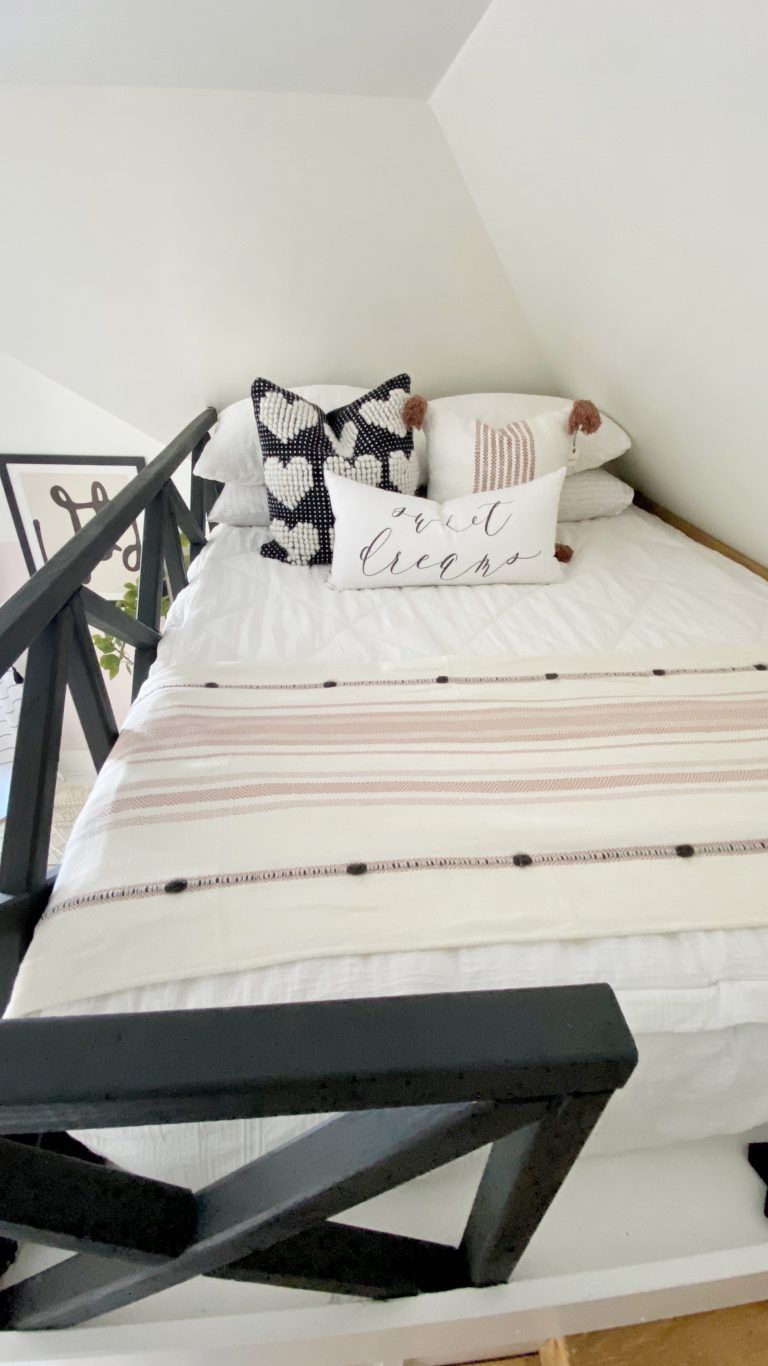
I knew from the very beginning that I was going to invest in Beddy’s bedding, and if you don’t know what that is then you need to check it out right now. It’s amazing. I know it’s a definite splurge, but Beddy’s allows you to make the whole bed by putting it all on like one fitted sheet. It then zips open and closed from each side! It’s so easy that even Ruby can make her bed! Beddy’s gave me a coupon code ALLIE for 20% off and the bedding I picked is called Love at First White. I also found this super cute pink pillow from Target, along with this fun black and pink throw blanket for the end of the bed.
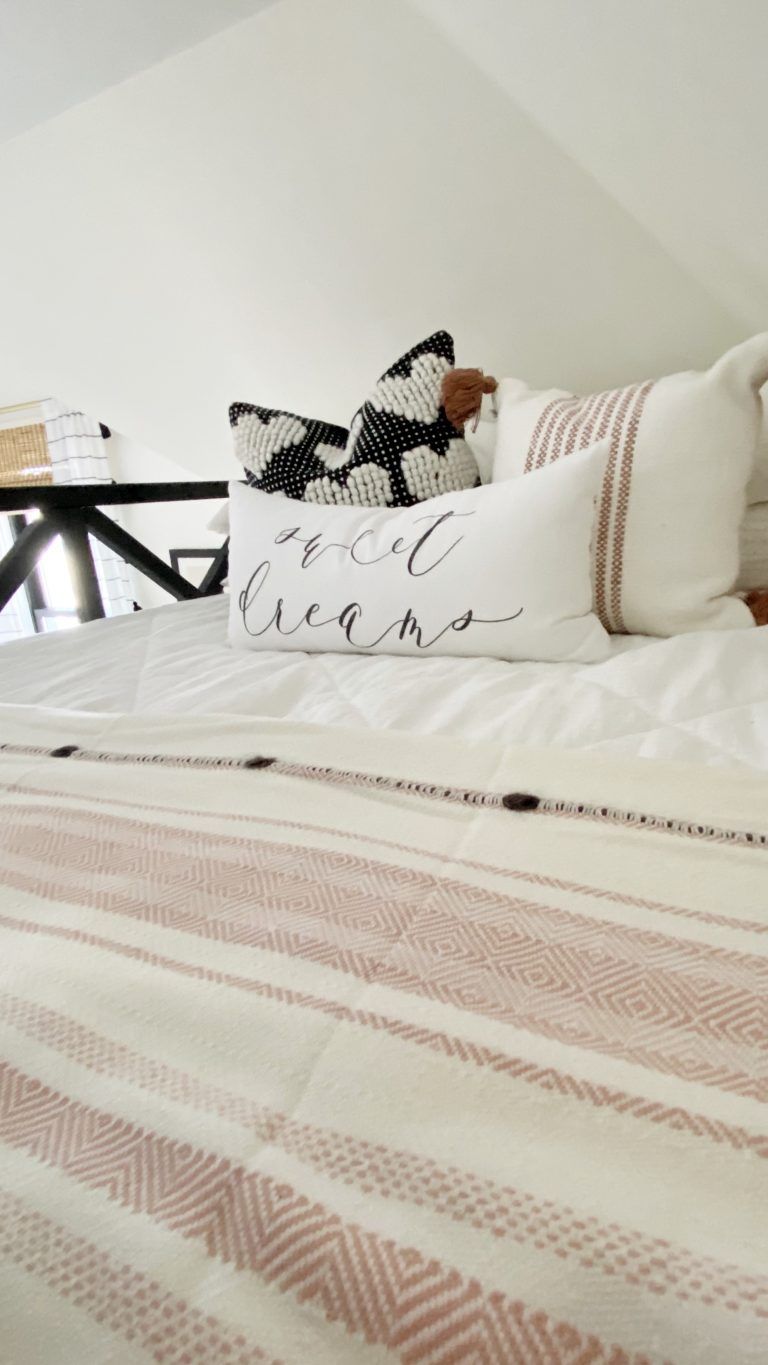
I also wanted to link up this cute sweet dreams pillow here, the memory foam mattress we got for a steal here that all of the kids love! And my all time favorite pillows that are so comfy and your head doesnt hit the ground here.
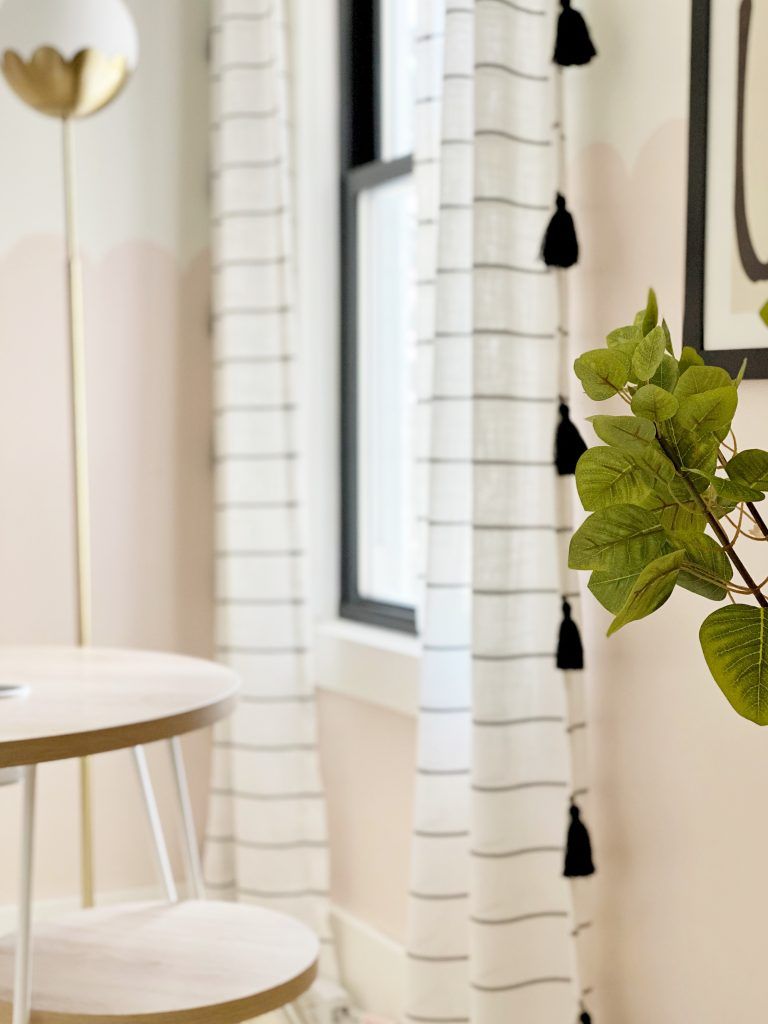
I forgot to mention that I found the curtains here, and also I couldn’t find this same floor lamp, but this one is super similar!
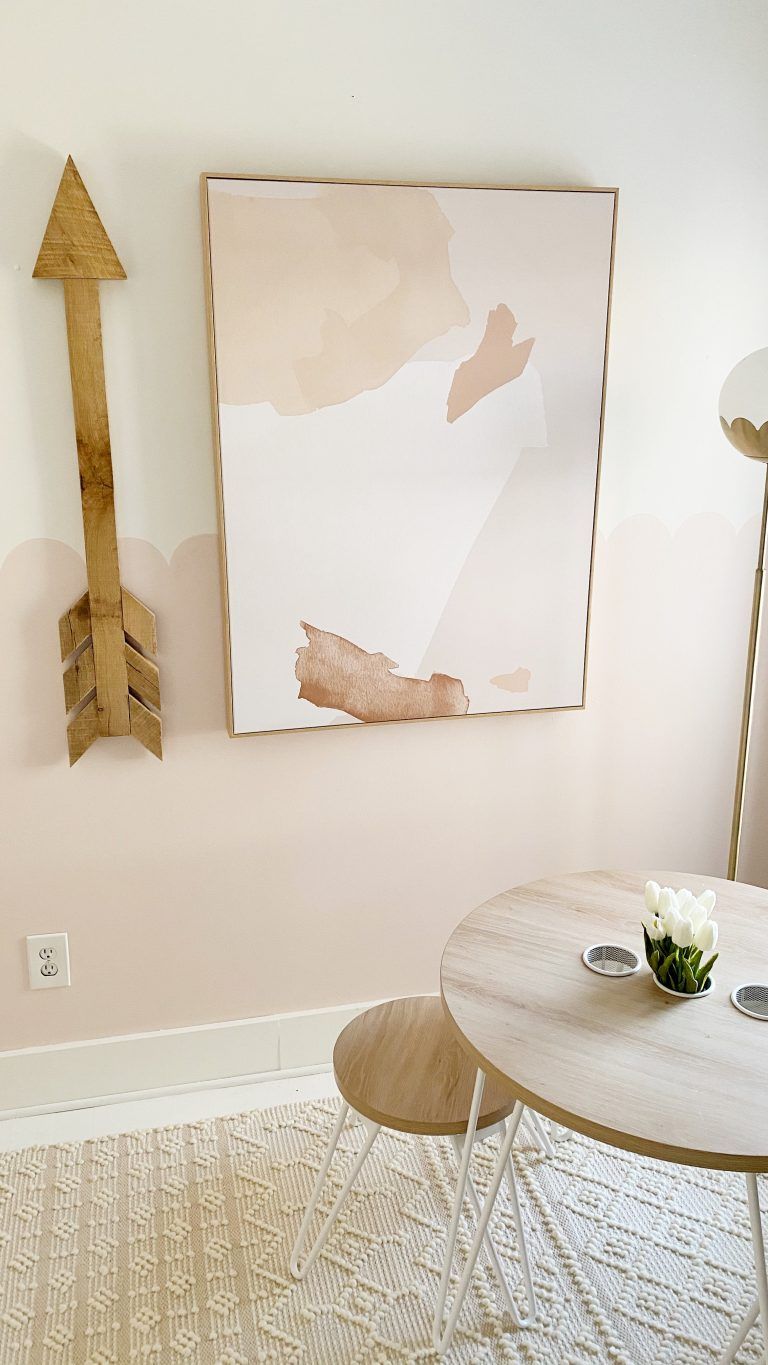
Oh, and my brother in law made this arrow, but you can find this big canvas art here.
This was as good as I could do to help you re-create your own loft house! Peek below in the carousel to find all of the links.